Efficient Bug Tracking in JIRA: A Comprehensive Guide to Creating Effective Bug Tickets 📝
Master the Art of Efficient Bug Tracking in JIRA with Expert Tips
Table of contents
- 🔍 Introduction
- 🗣 Why Creating Efficient Bug Tickets Matters
- 🗂️ Creating an Efficient Bug Ticket in JIRA: Step-by-Step
- 🗺️ Step 1: Choose the Right Project and Issue Type
- 🖼️ Step 2: Write a Clear Title
- 📝 Step 3: Explain the Problem
- 🦸♀️ Step 4: Assign the Bug to the Right Person
- 🛠️ Step 5: Set Priority and Severity
- 📉 Step 6: Add Relevant Labels and Components
- 📄 Step 7: Link the Relevant Epic story
- 🎯 Step 8: Select the Sprint if you are following Scrum/Sprint model
- 👷♀️ Step 9: Select the Tester
- 📤 Step 10: Link the Bug ticket with Reference Tickets
- 🖊️ Step 11: Review and Submit
- 💯 Additional Tips for Efficient Bug Ticket Creation
- 🔦 Conclusion
- ✨ Resources for Further Reading
🔍 Introduction
In software Testing, effective bug tracking is crucial for maintaining quality and ensuring smooth project progress. JIRA is a powerful tool that can help streamline this process, but only if you know how to use it effectively. This guide will walk you through the essentials of Efficient Bug Tracking in JIRA, showing you how to create clear, concise, and actionable bug tickets. Whether you're a developer, tester, or project manager, mastering these techniques will save you time and improve your team's productivity.
🗣 Why Creating Efficient Bug Tickets Matters
Before we dive into the "how," let's understand why creating effective bug tickets is so important:
Clarity: A well-crafted bug ticket leaves no room for ambiguity. It clearly defines the issue, making it easier for developers to understand and address.
Prioritization: Detailed bug tickets help project managers prioritize issues effectively. They can assess the impact and urgency of each bug.
Efficiency: A streamlined bug-reporting process saves time and resources. Developers can get to work promptly, and QA teams can track progress efficiently.
Documentation: Bug tickets serve as historical records of issues and their resolutions. They're invaluable for future reference and auditing.
🗂️ Creating an Efficient Bug Ticket in JIRA: Step-by-Step
Now, let's break down the process of creating a bug ticket in JIRA into actionable steps, enriched with practical tips and examples.
🗺️ Step 1: Choose the Right Project and Issue Type
In JIRA, different projects may have various workflows and custom fields.
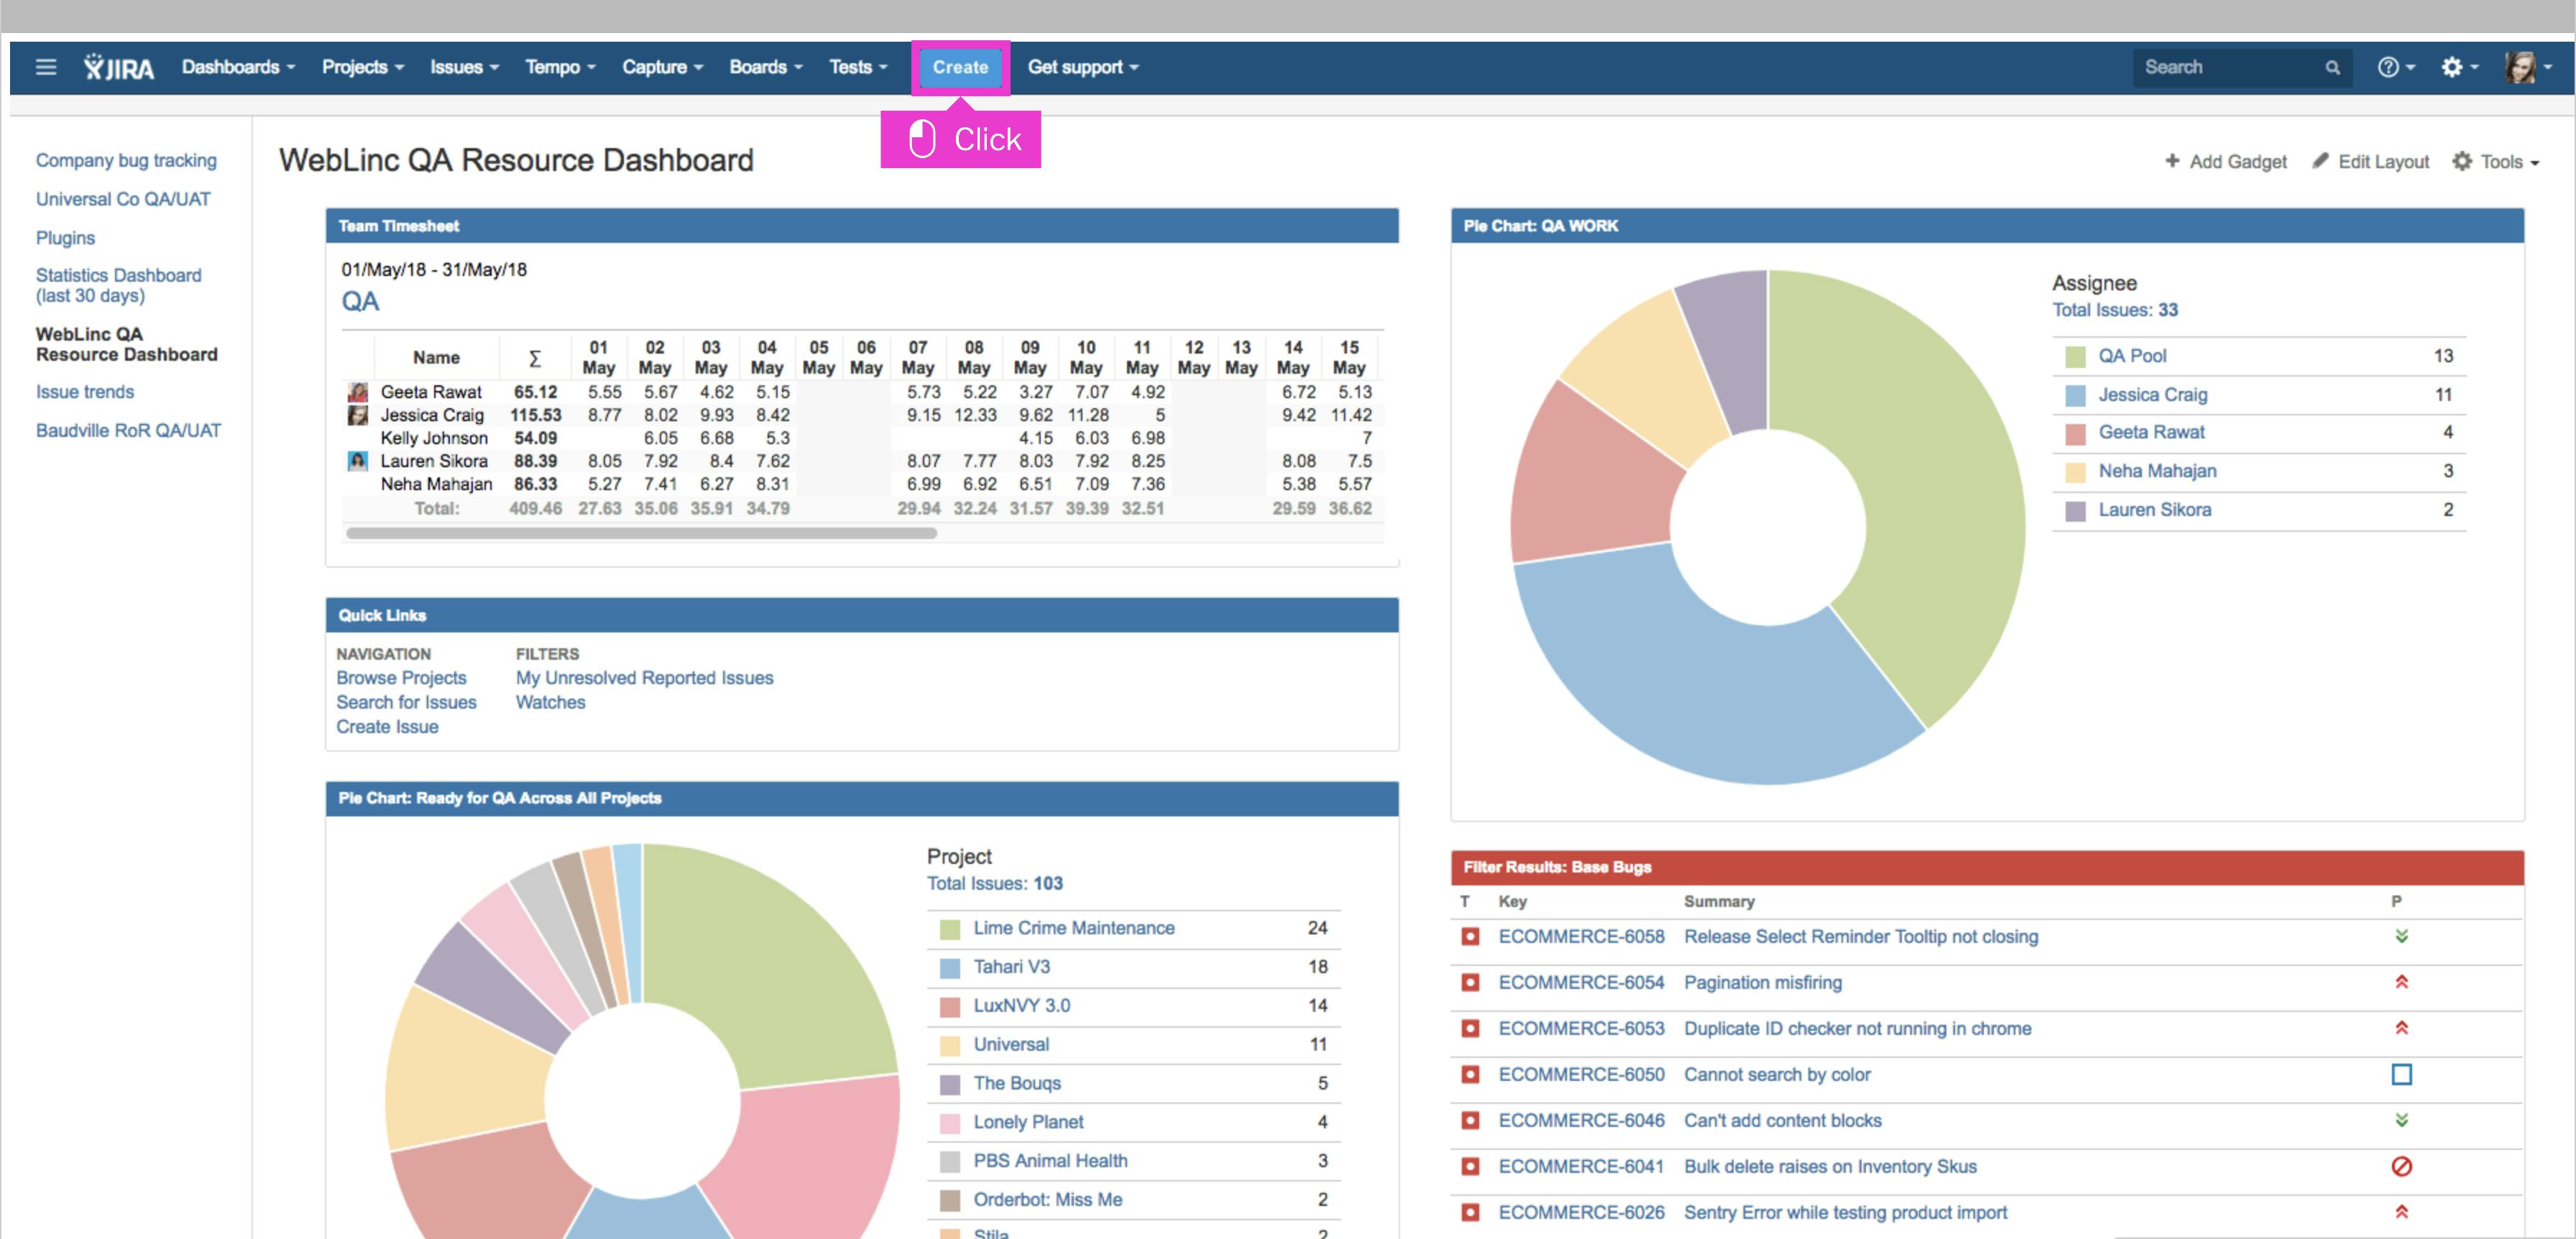
To create a new bug ticket, navigate to JIRA and click the Create button in the top navigation**.**
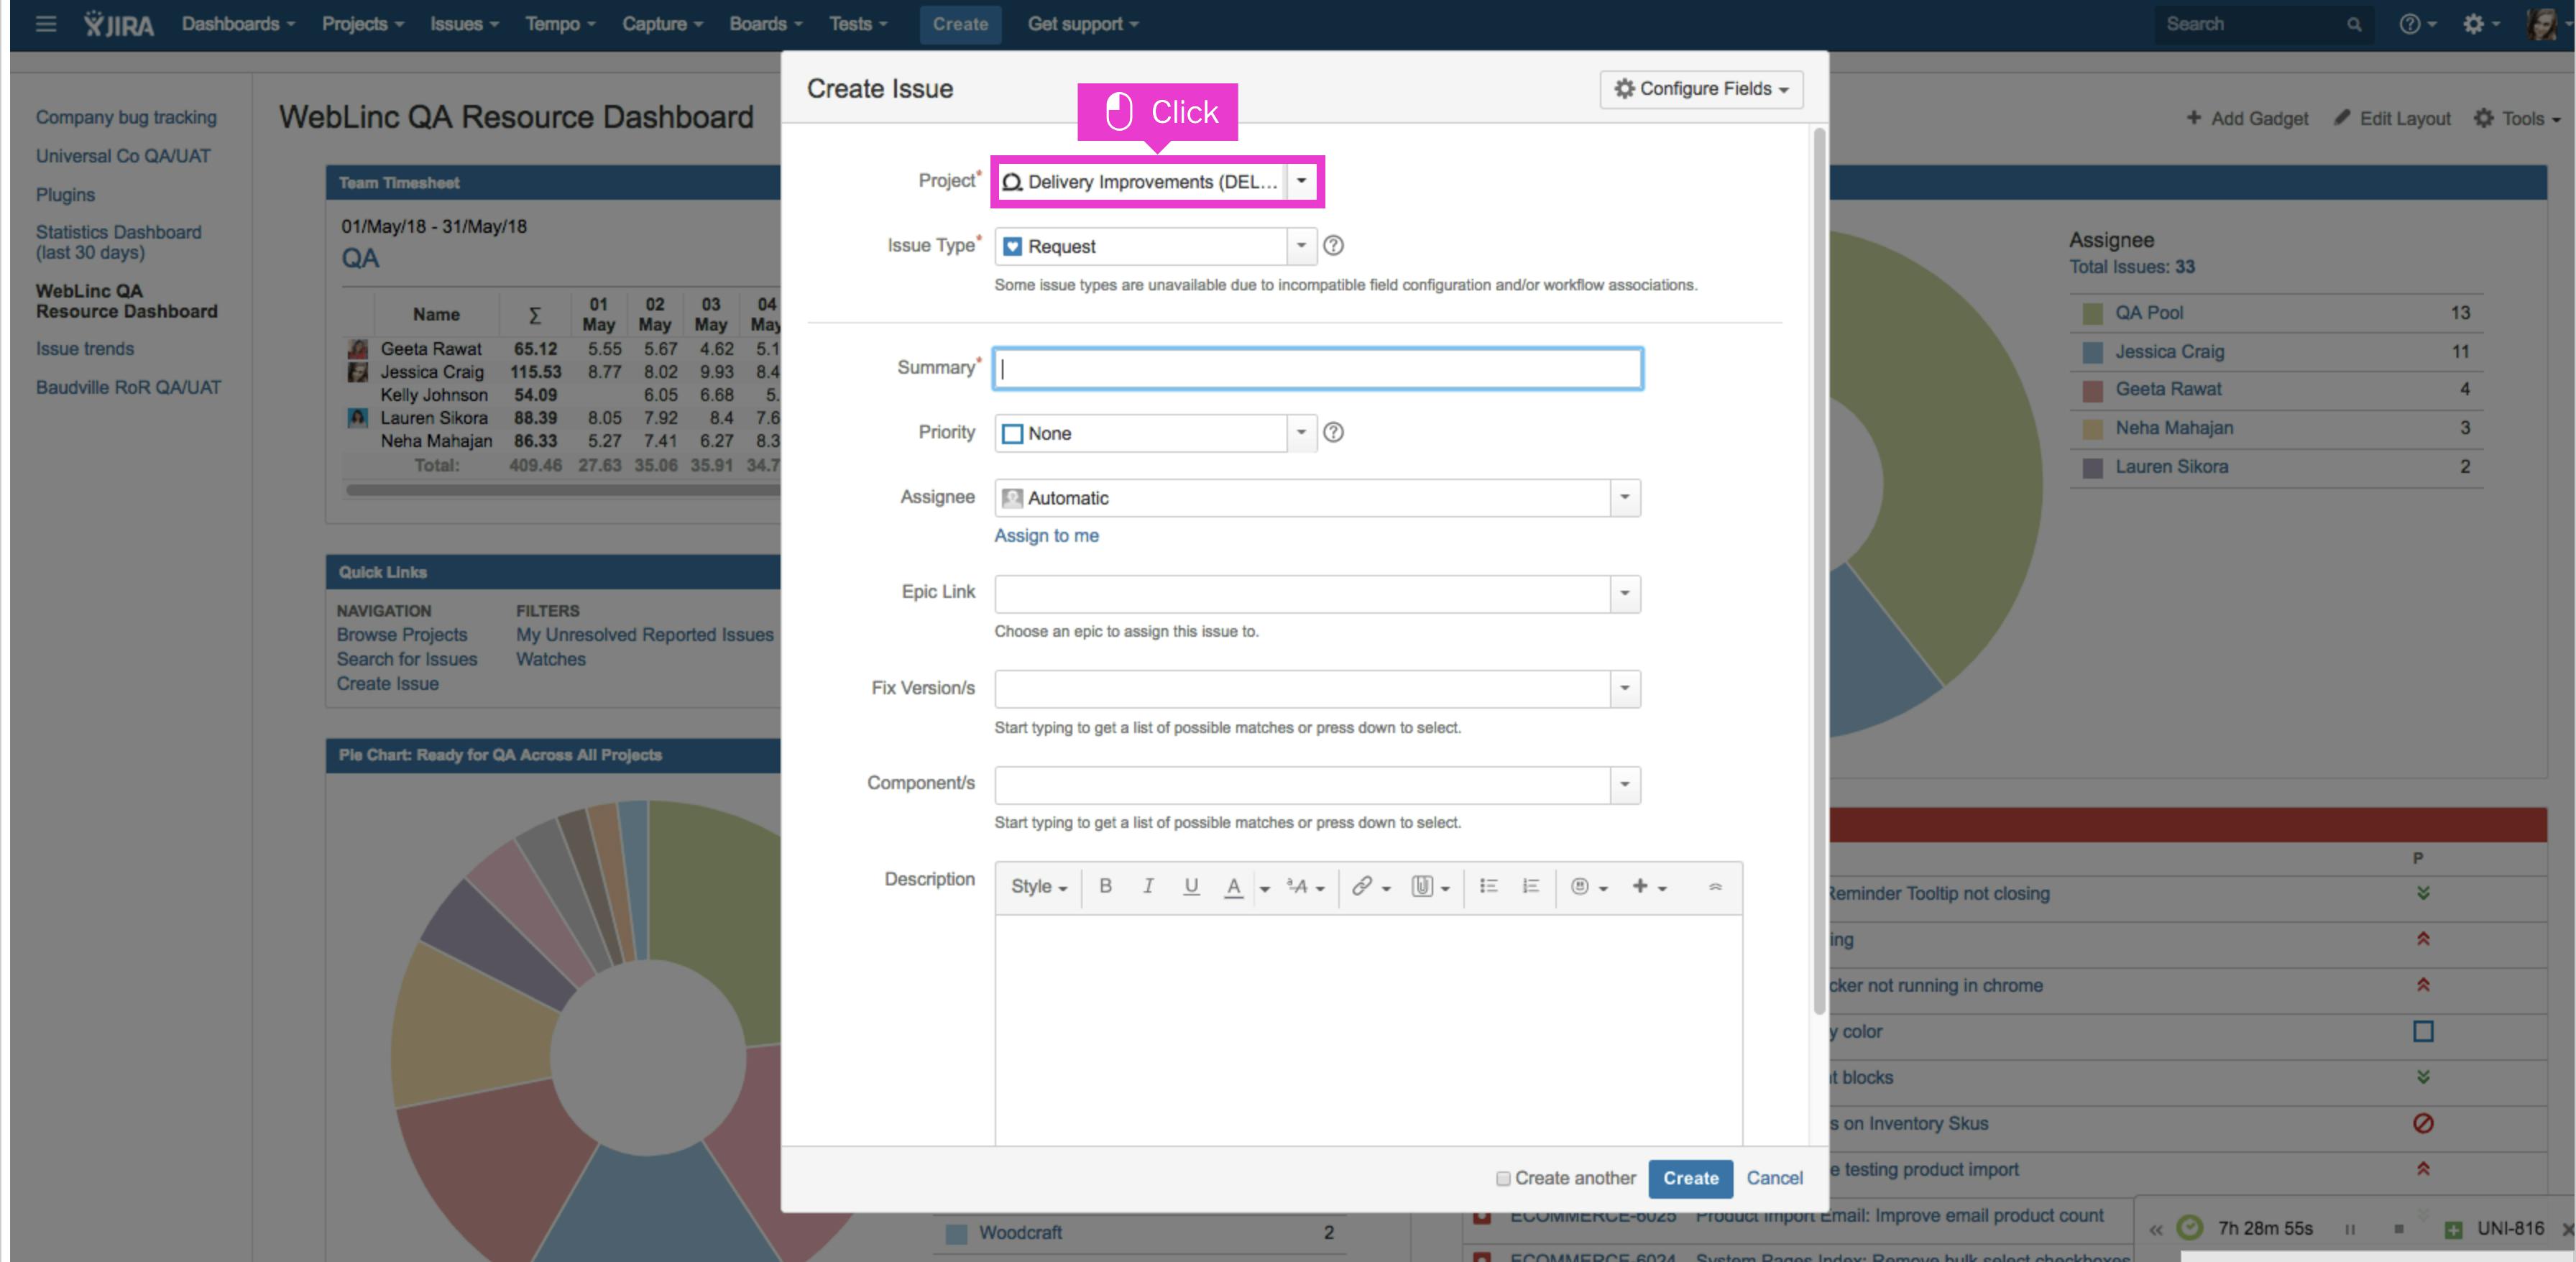
The "Create Issue Dialog" will open. Click the Project dropdown to open.
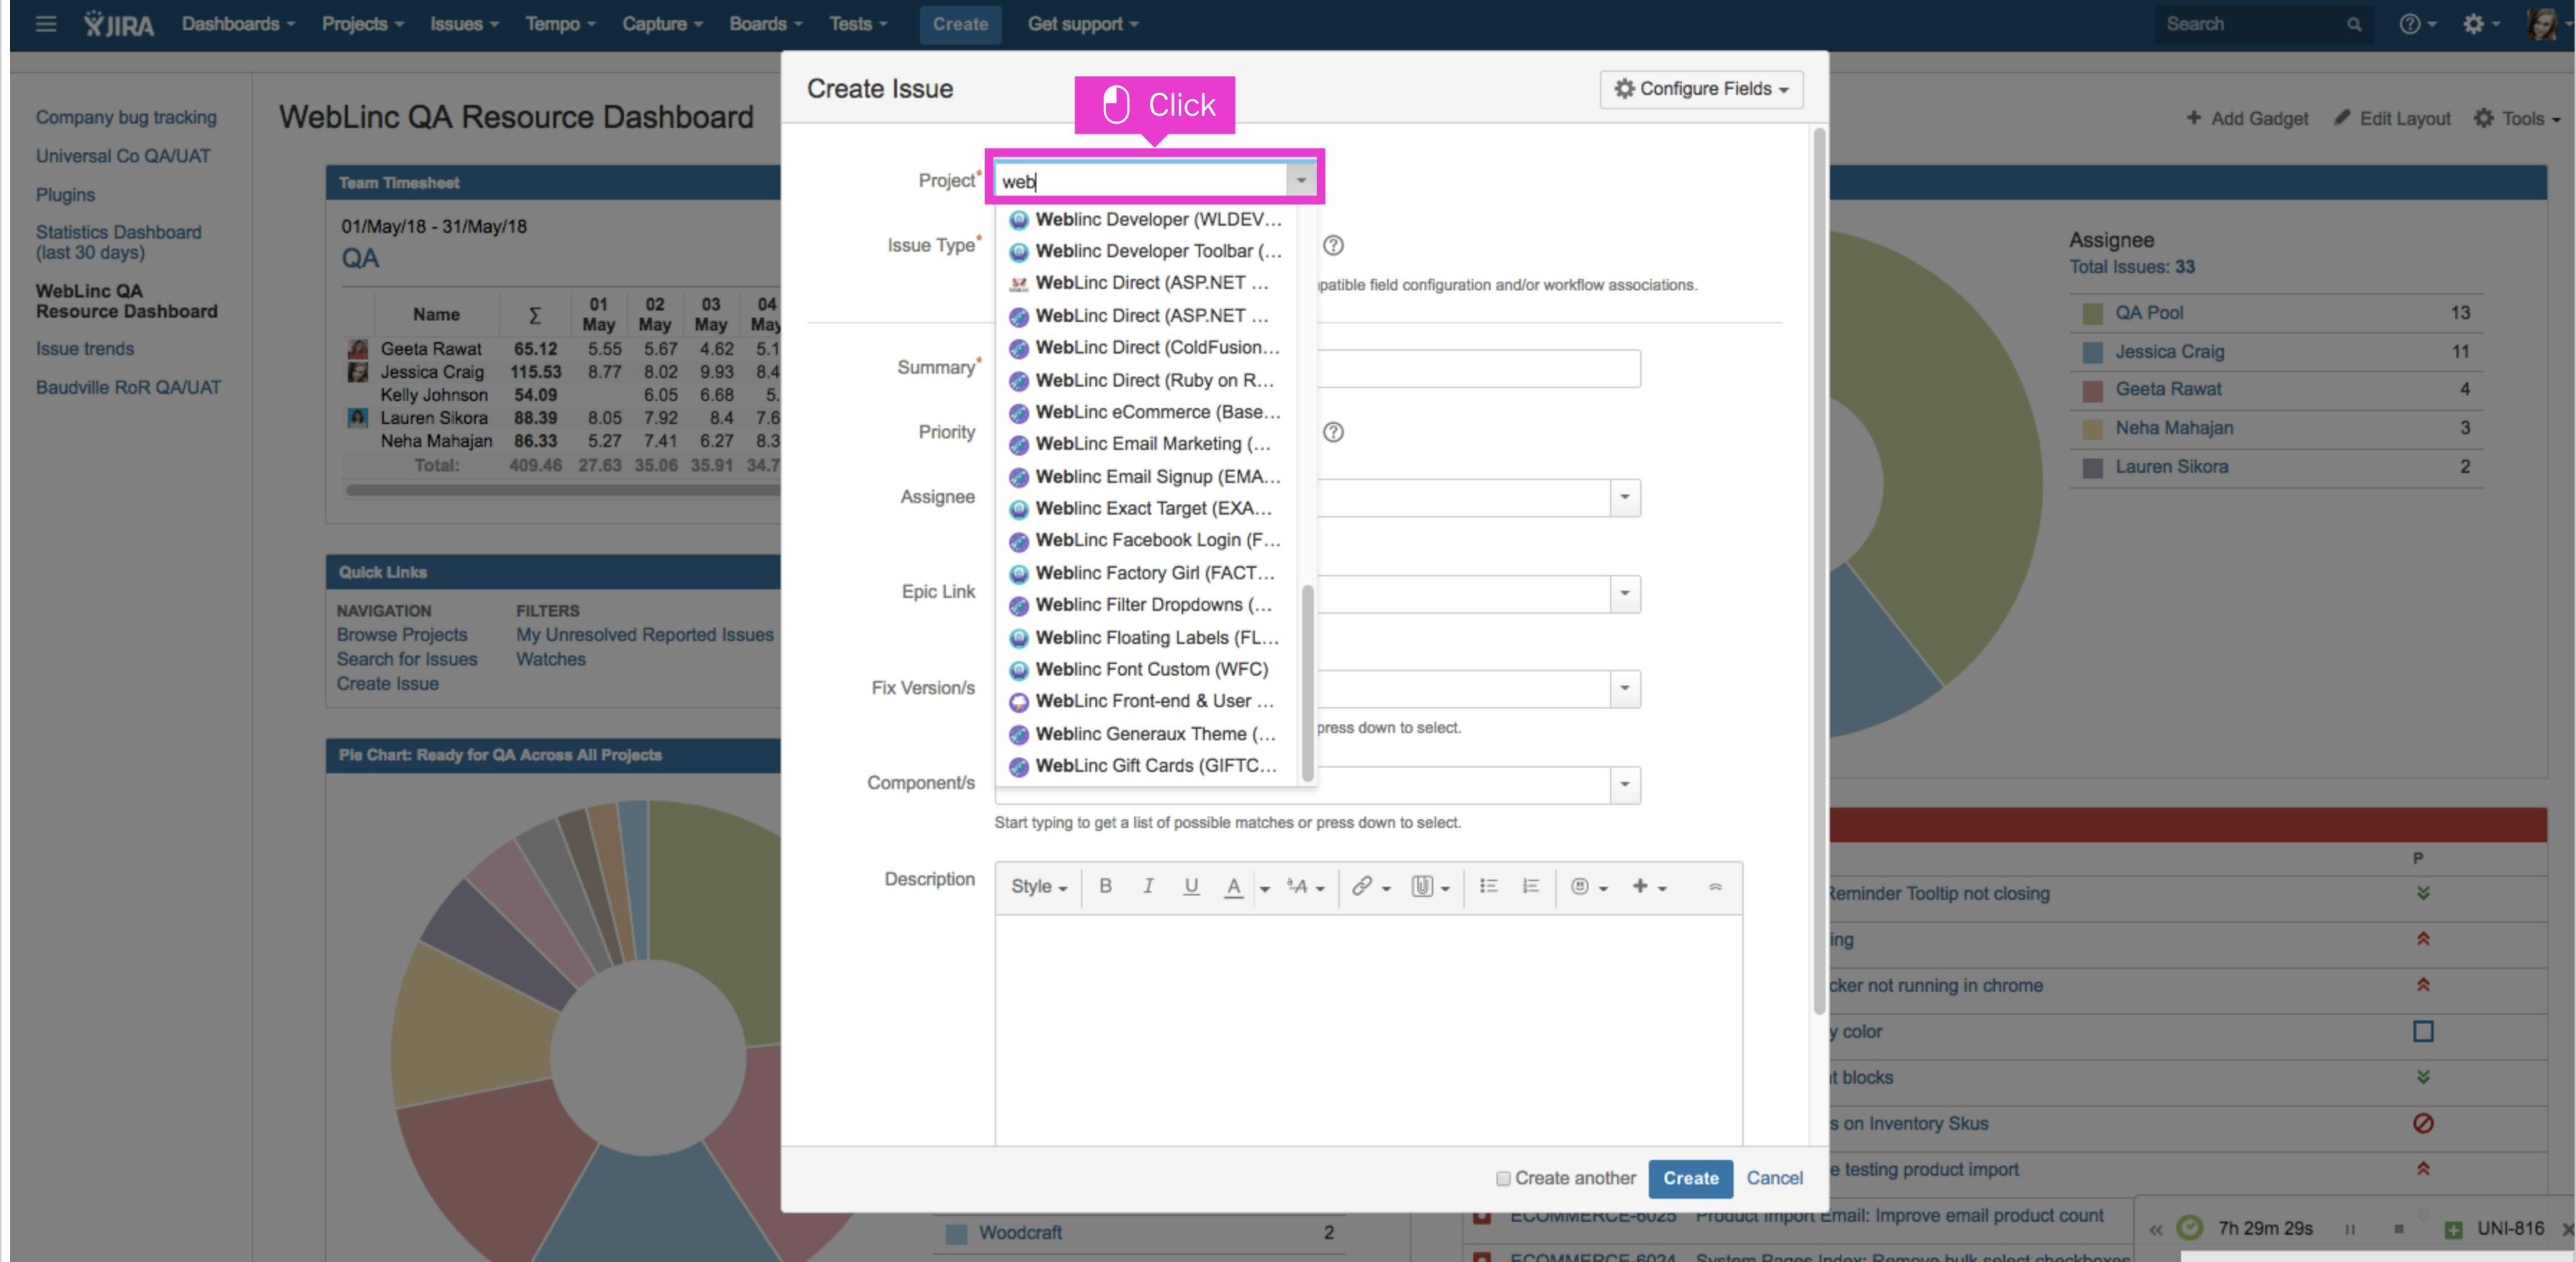
Click within the project dropdown and start typing the name of the project to auto-populate its JIRA project.
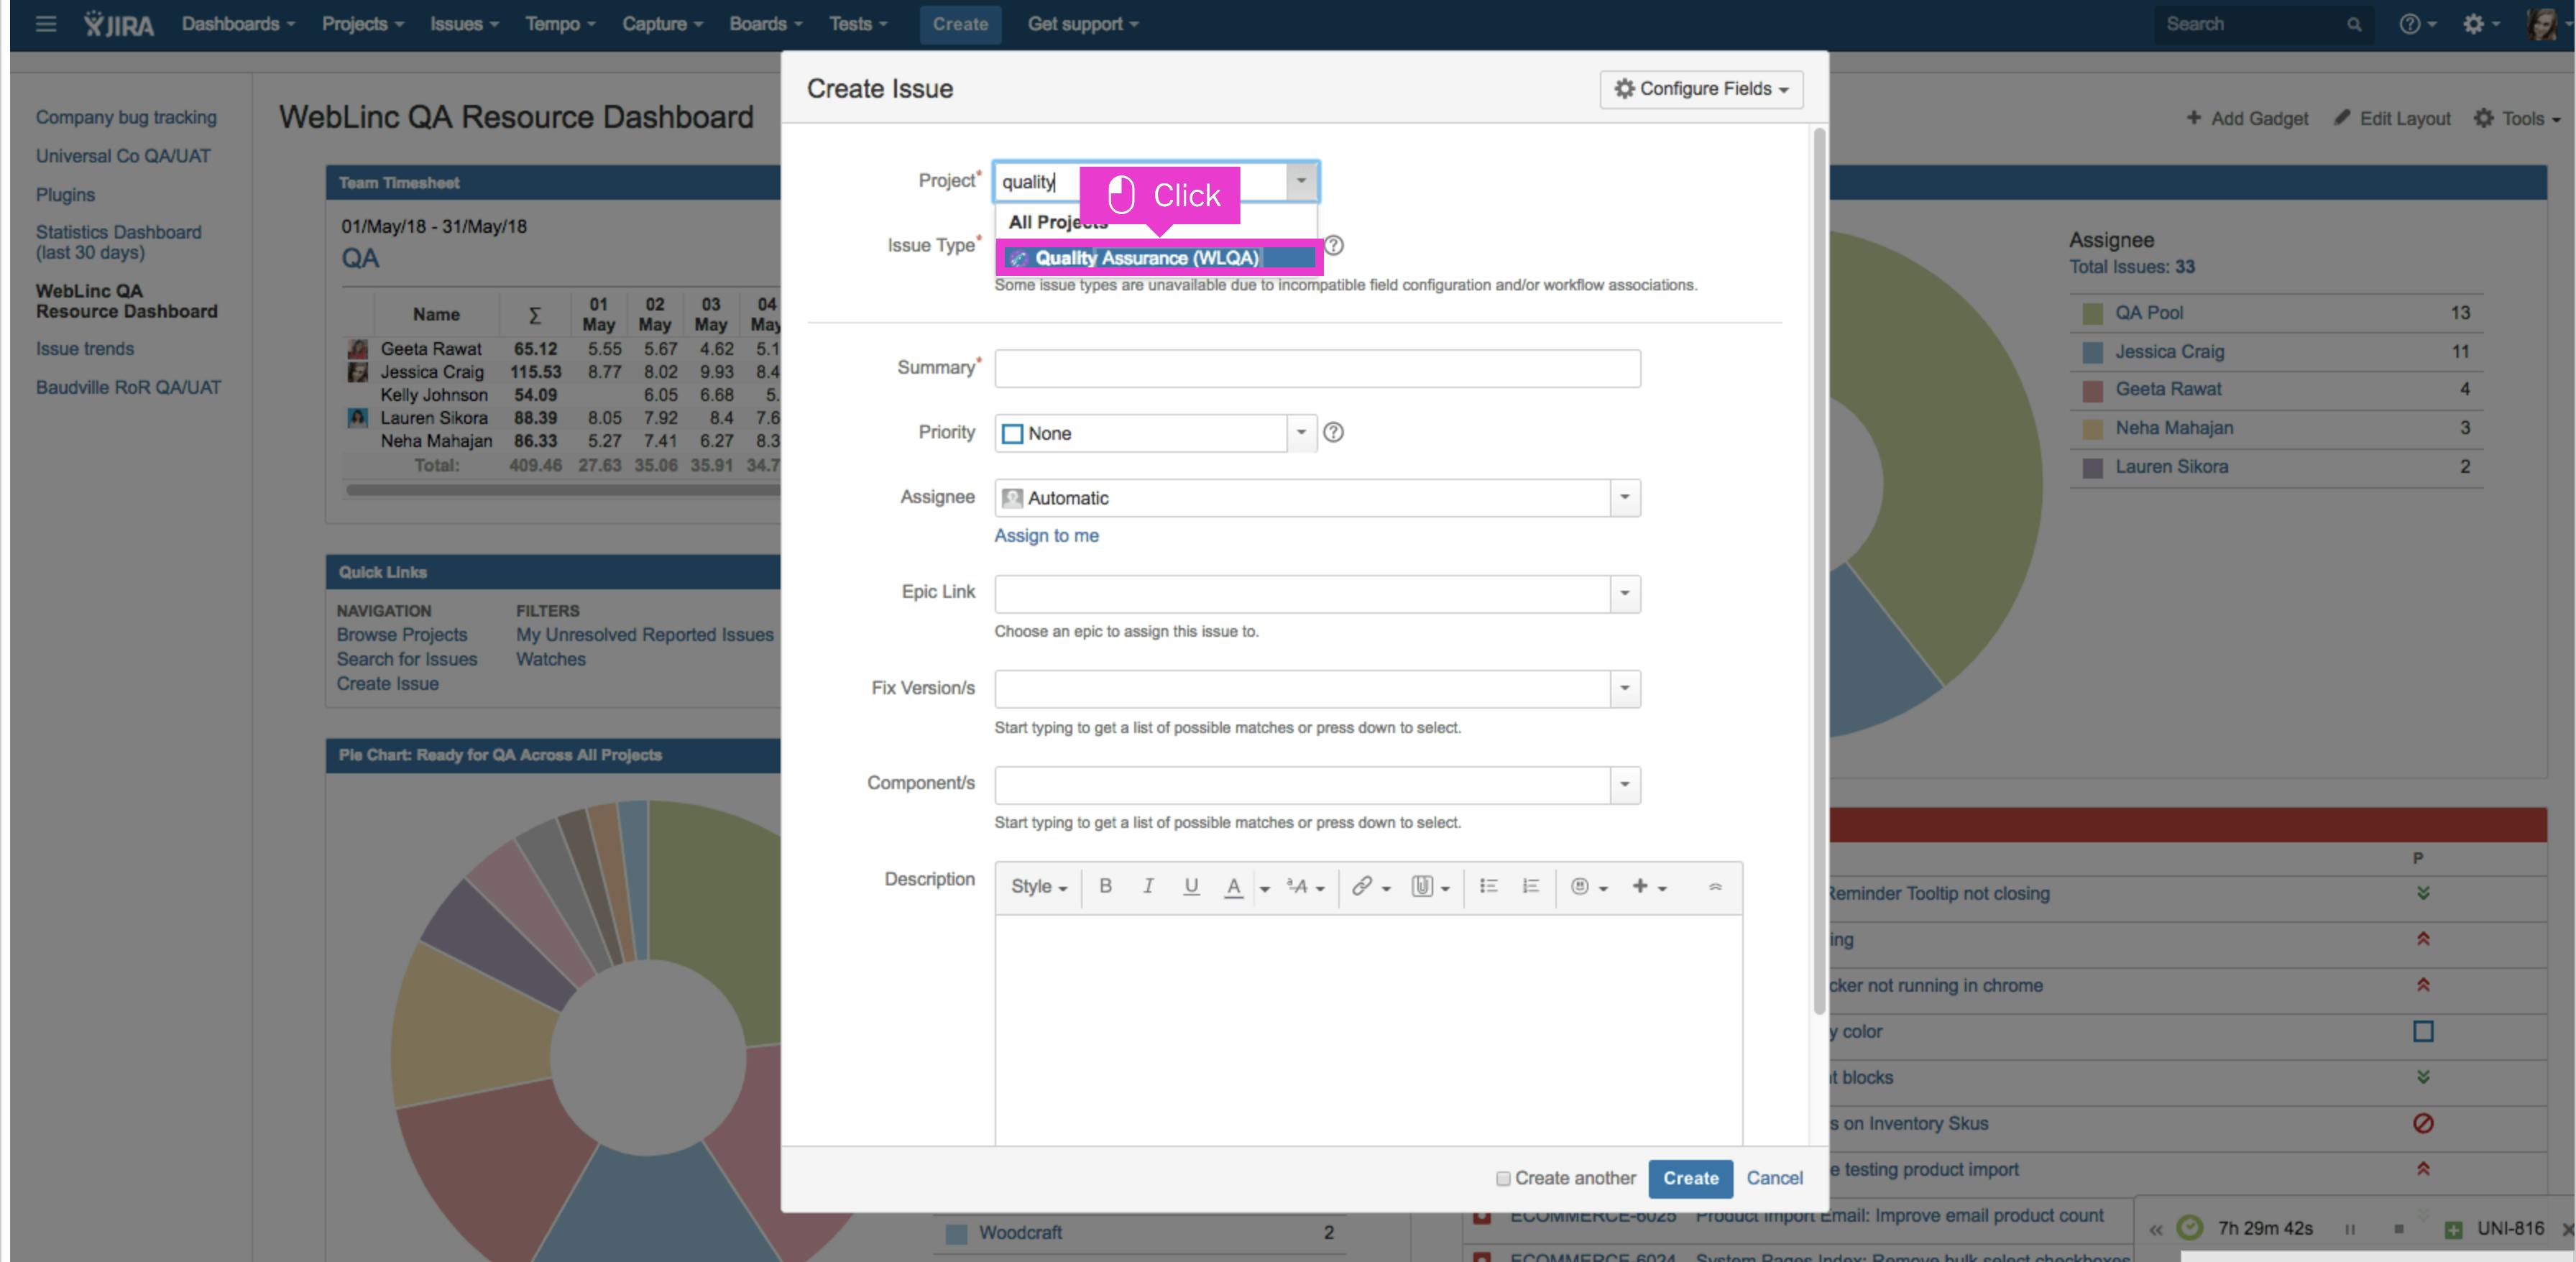
Once your project populates, select it in the dropdown drawer.
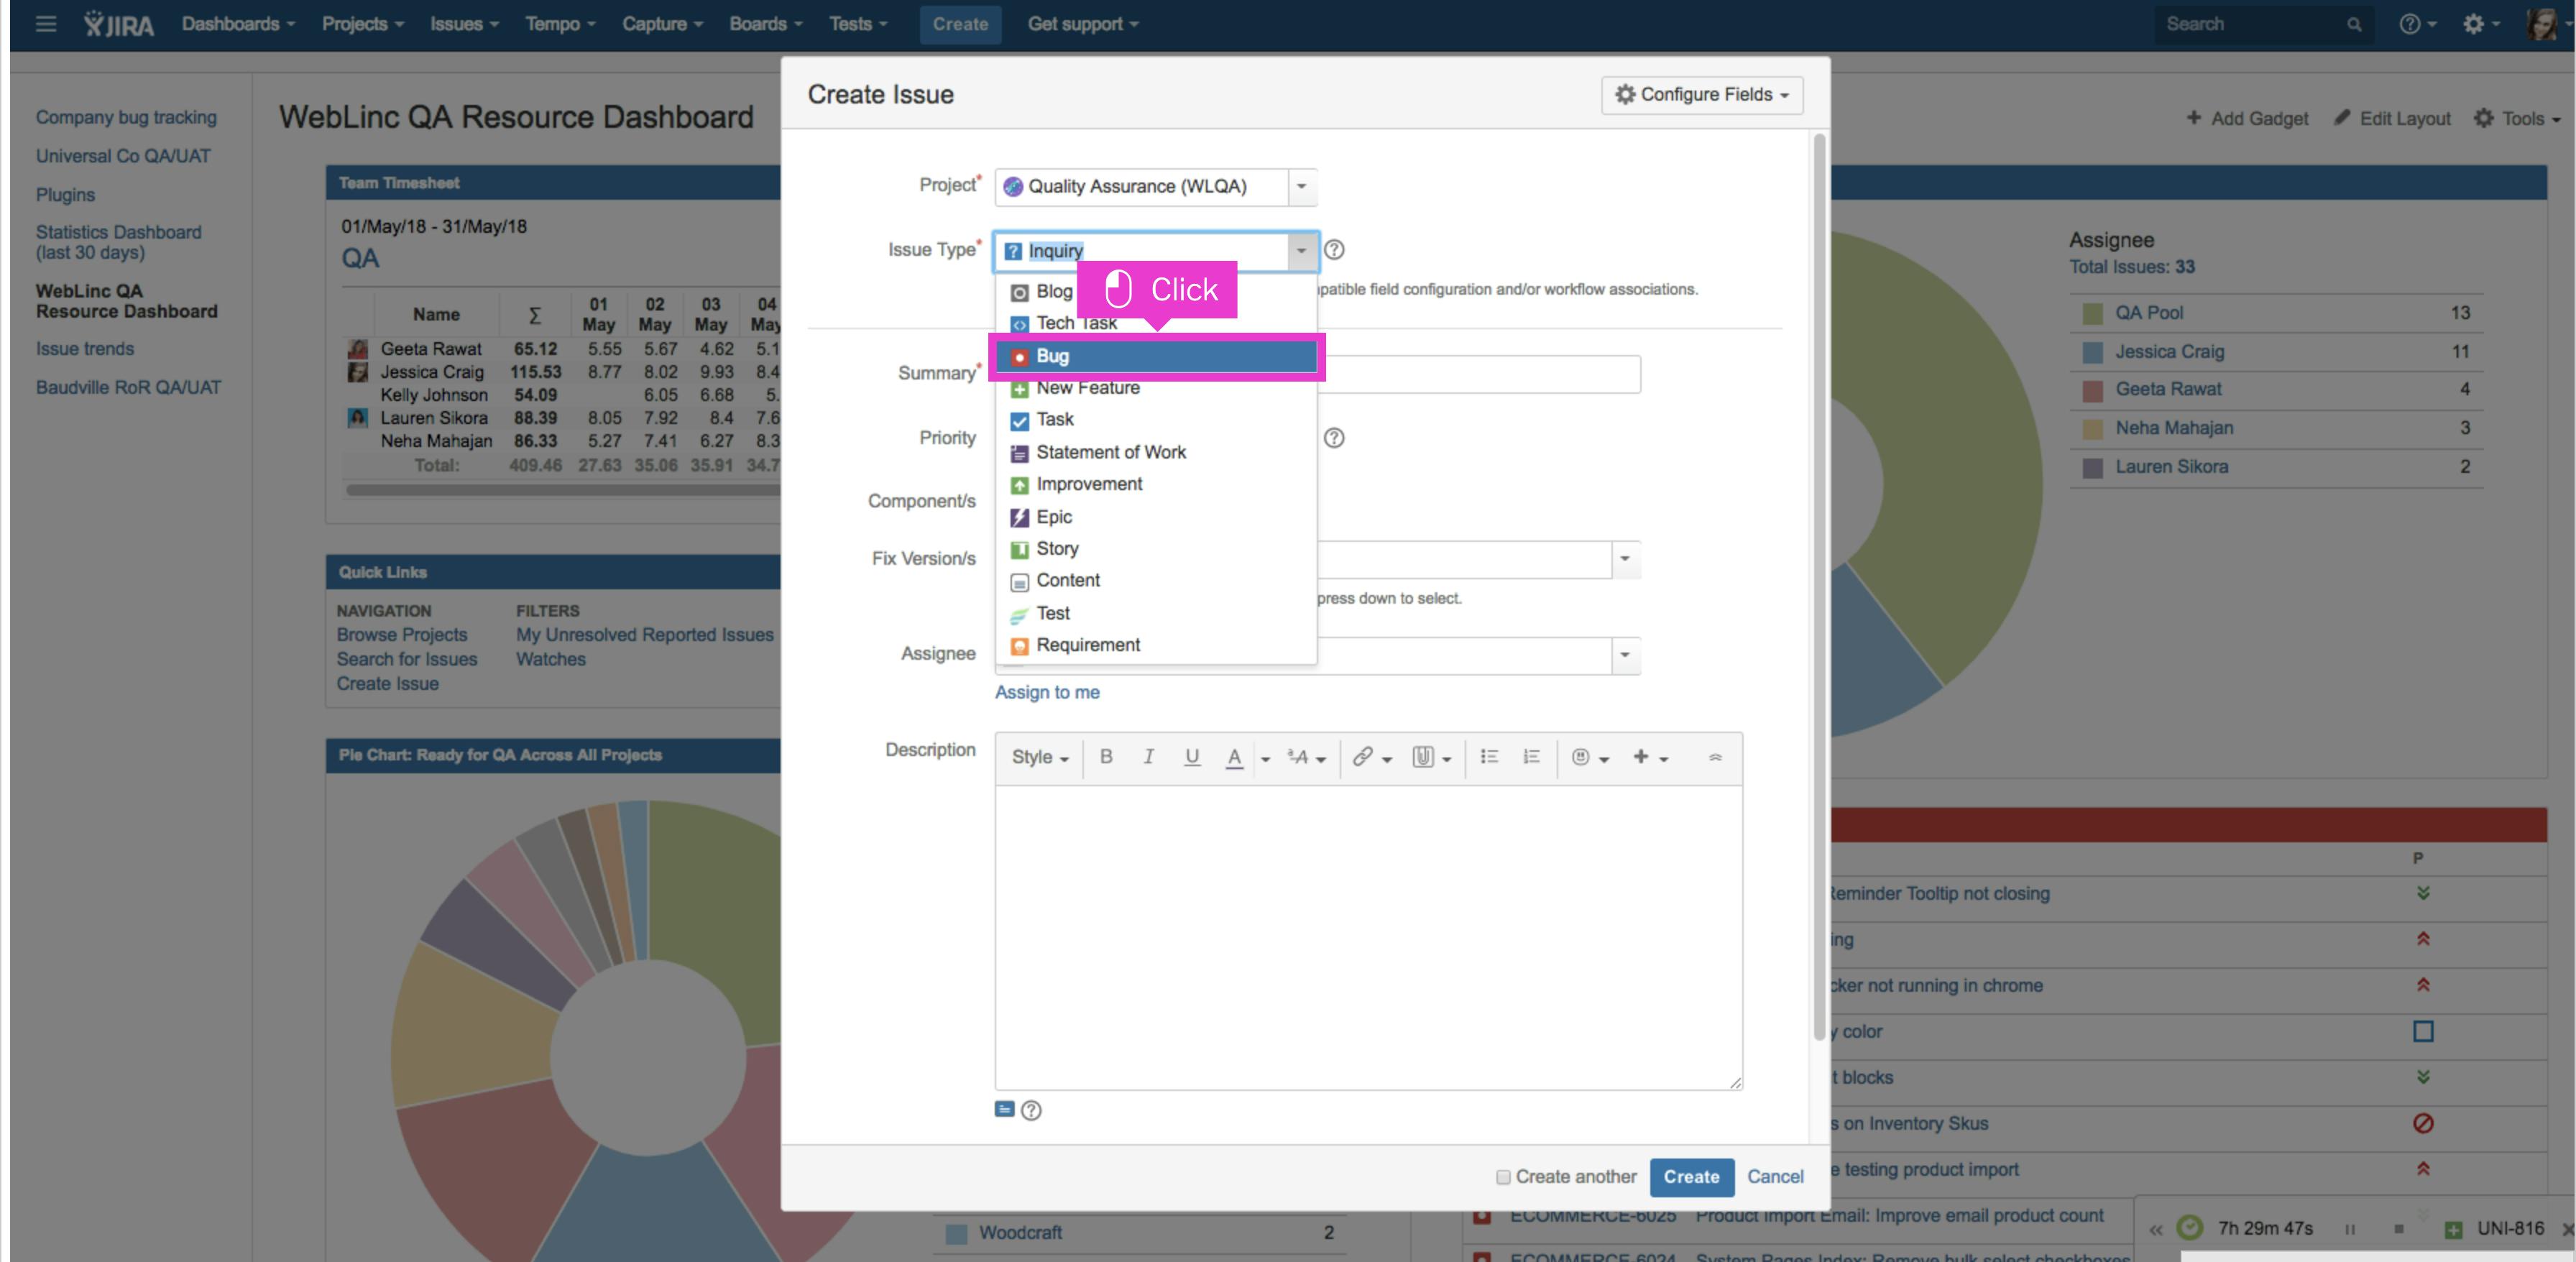
Choose your issue ticket type by clicking the issue type field to open**.**
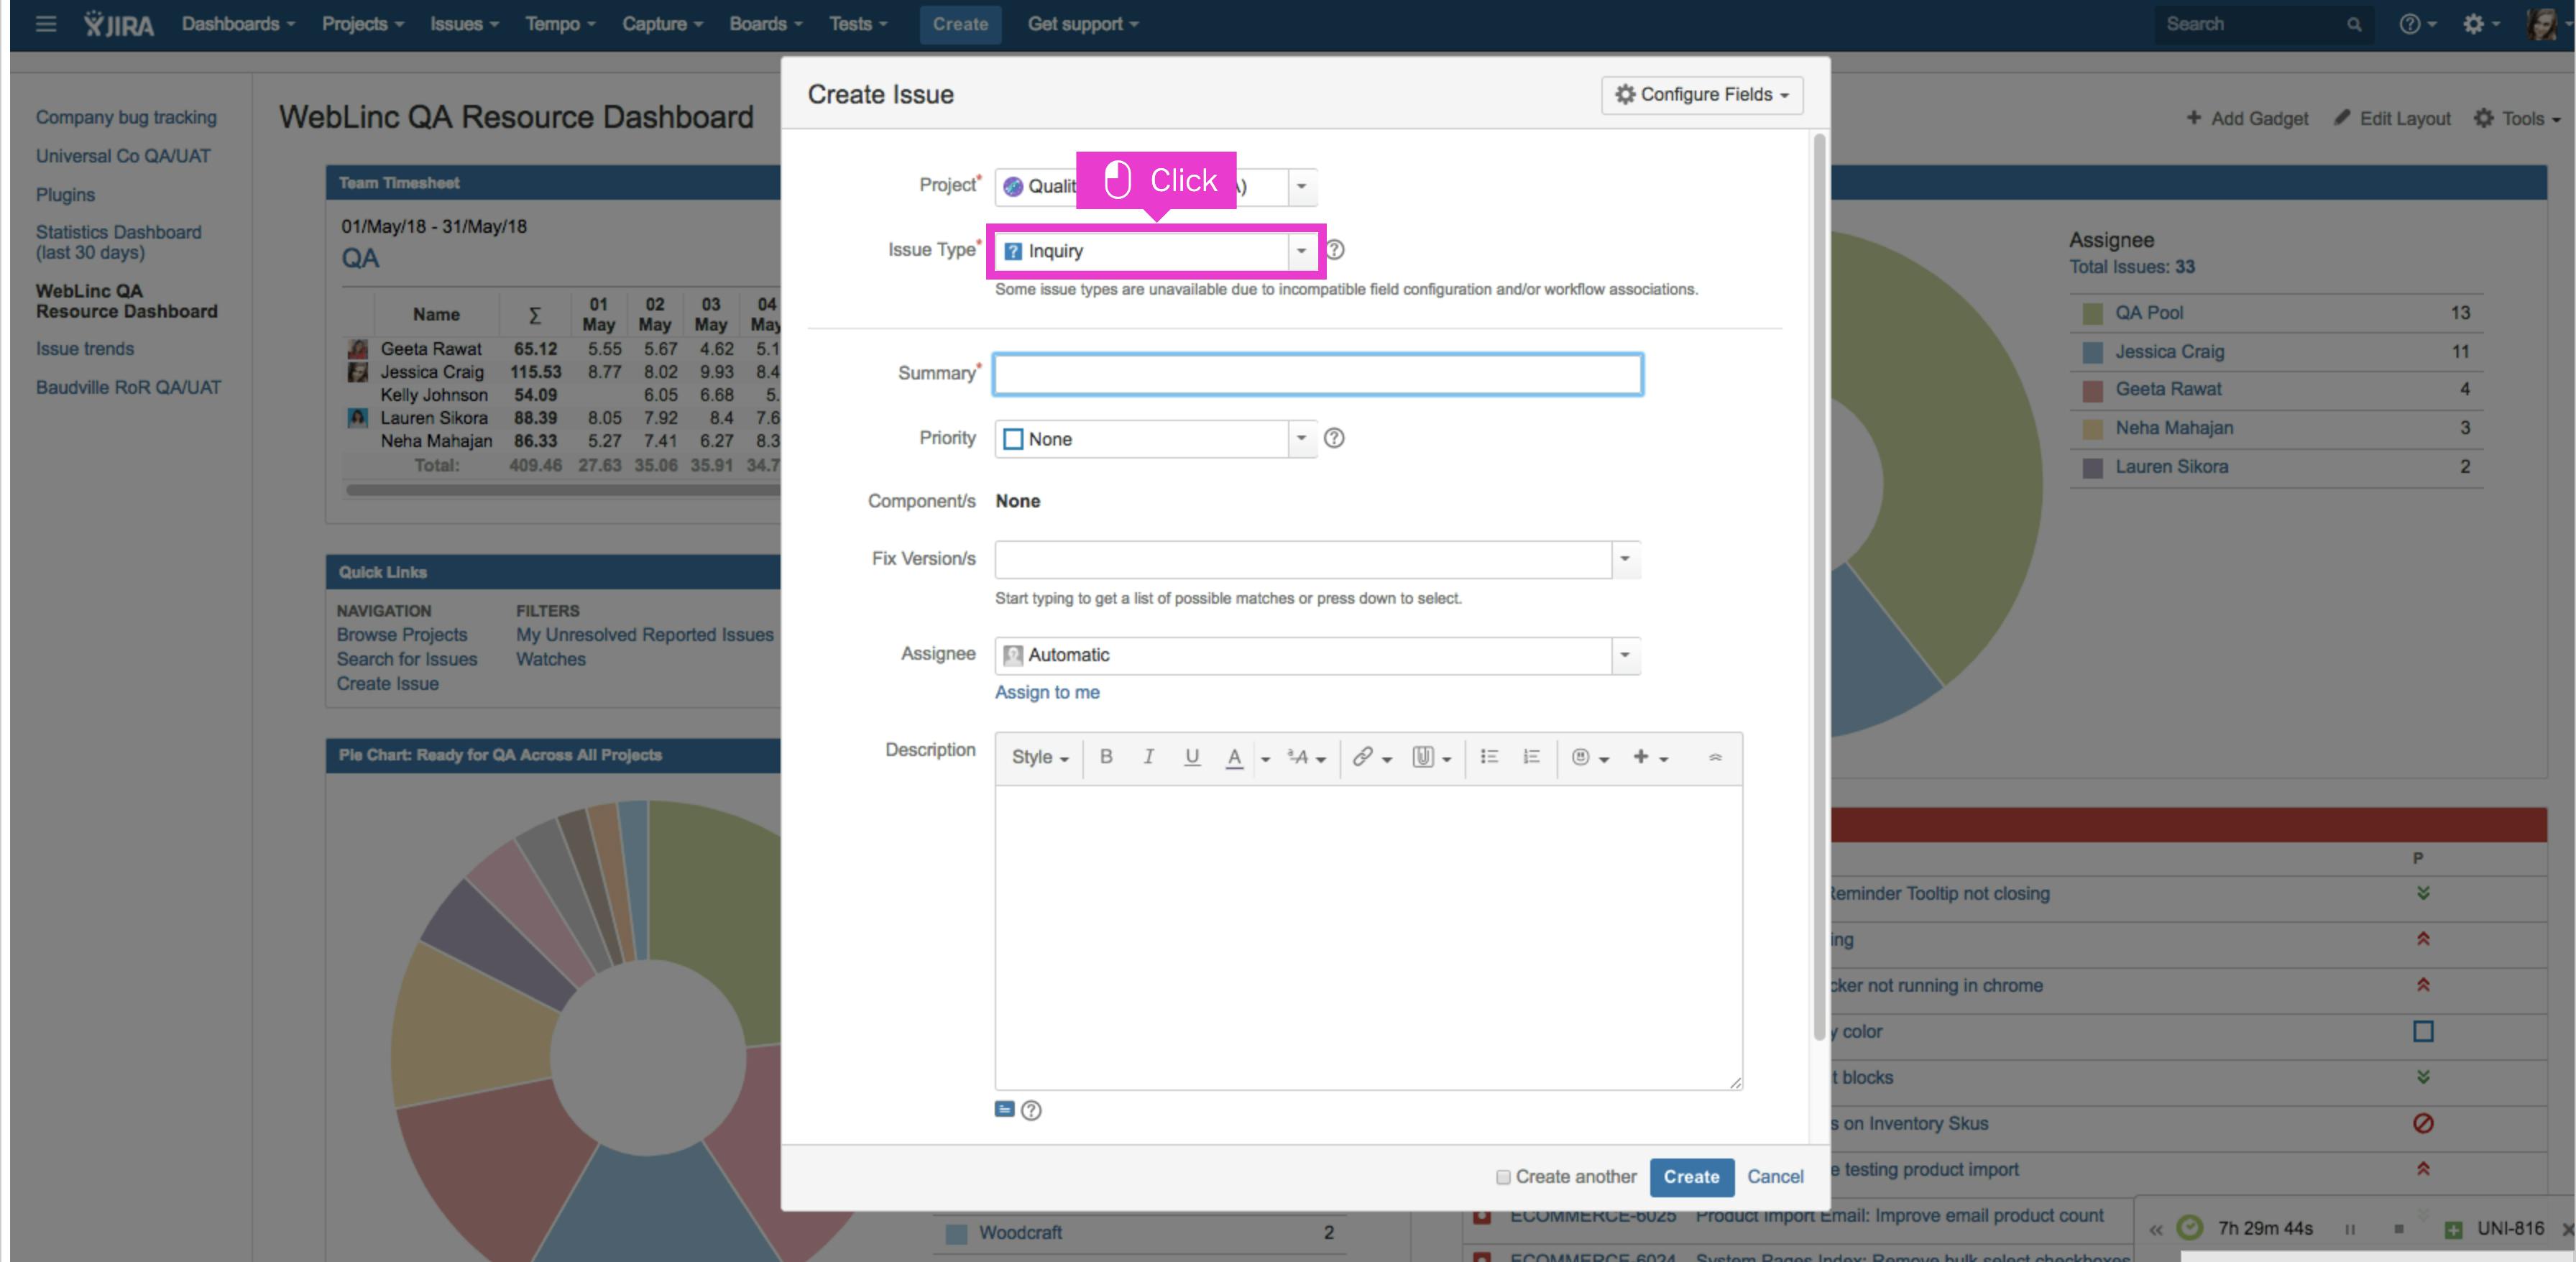
Click the issue type: Bug
Select the project that corresponds to the software you're working on.
Next, choose the appropriate issue type, usually "Bug" or a similar category.
🖼️ Step 2: Write a Clear Title
The title should summarize the problem. Instead of "App Issue," say something like "Can't Log In on Mobile App After Update."
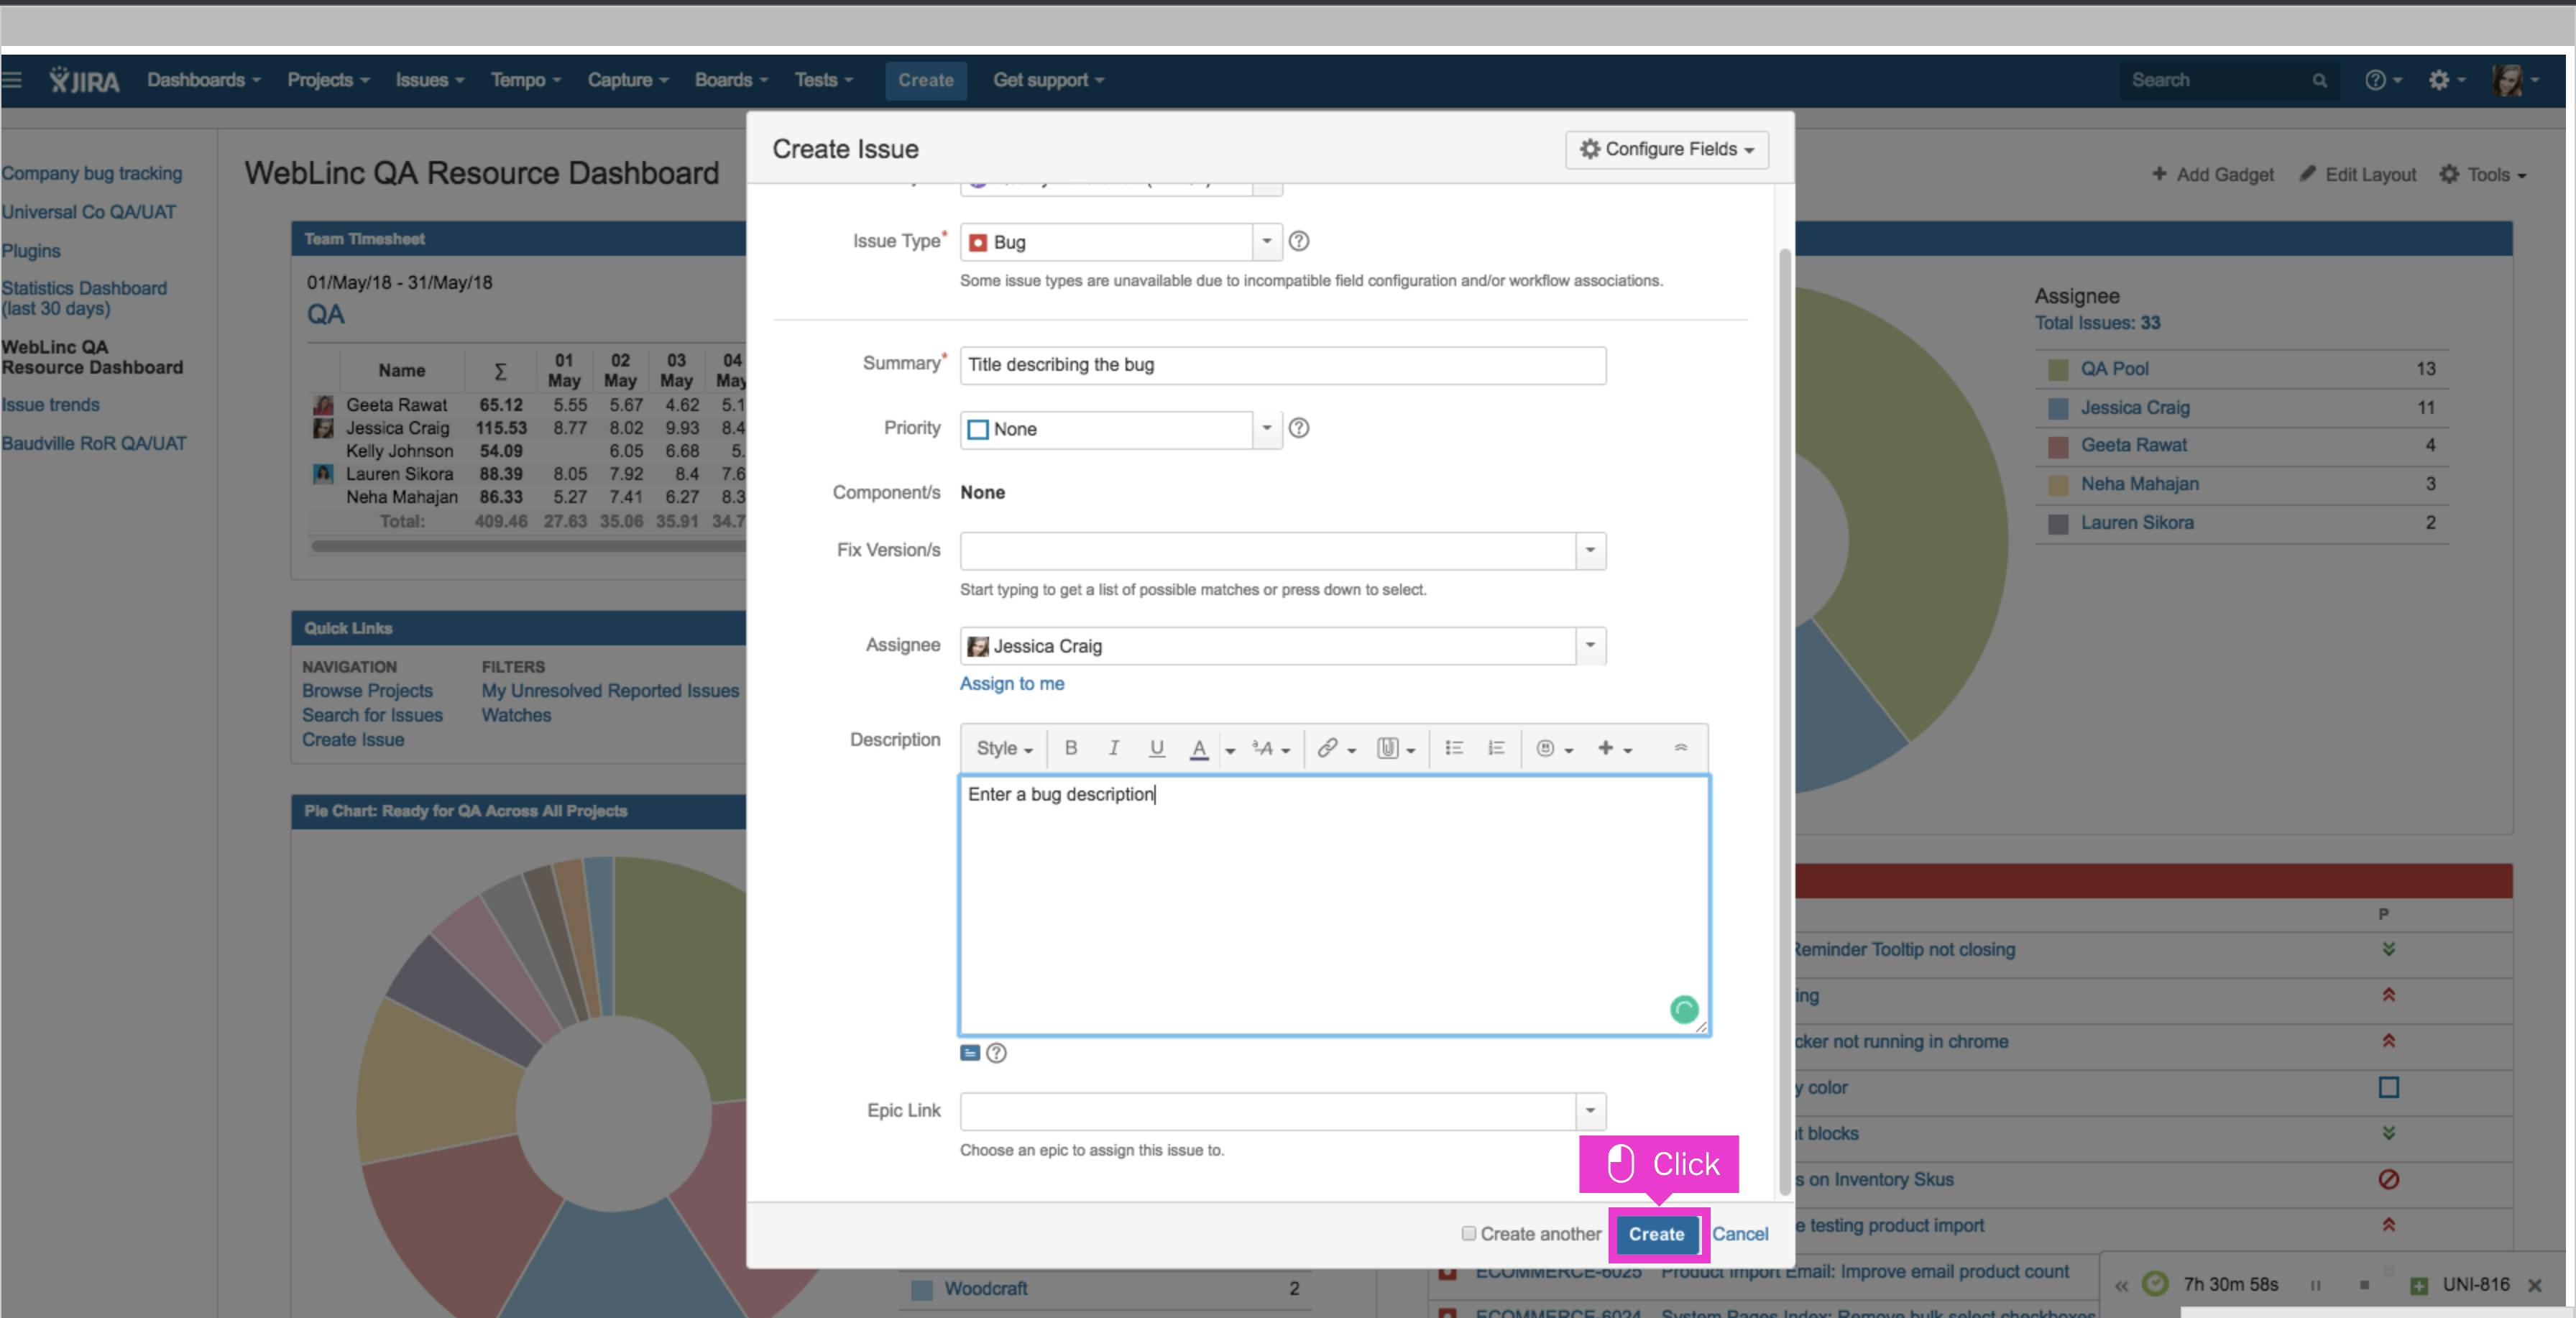
Click the Summary field and enter the bug title.
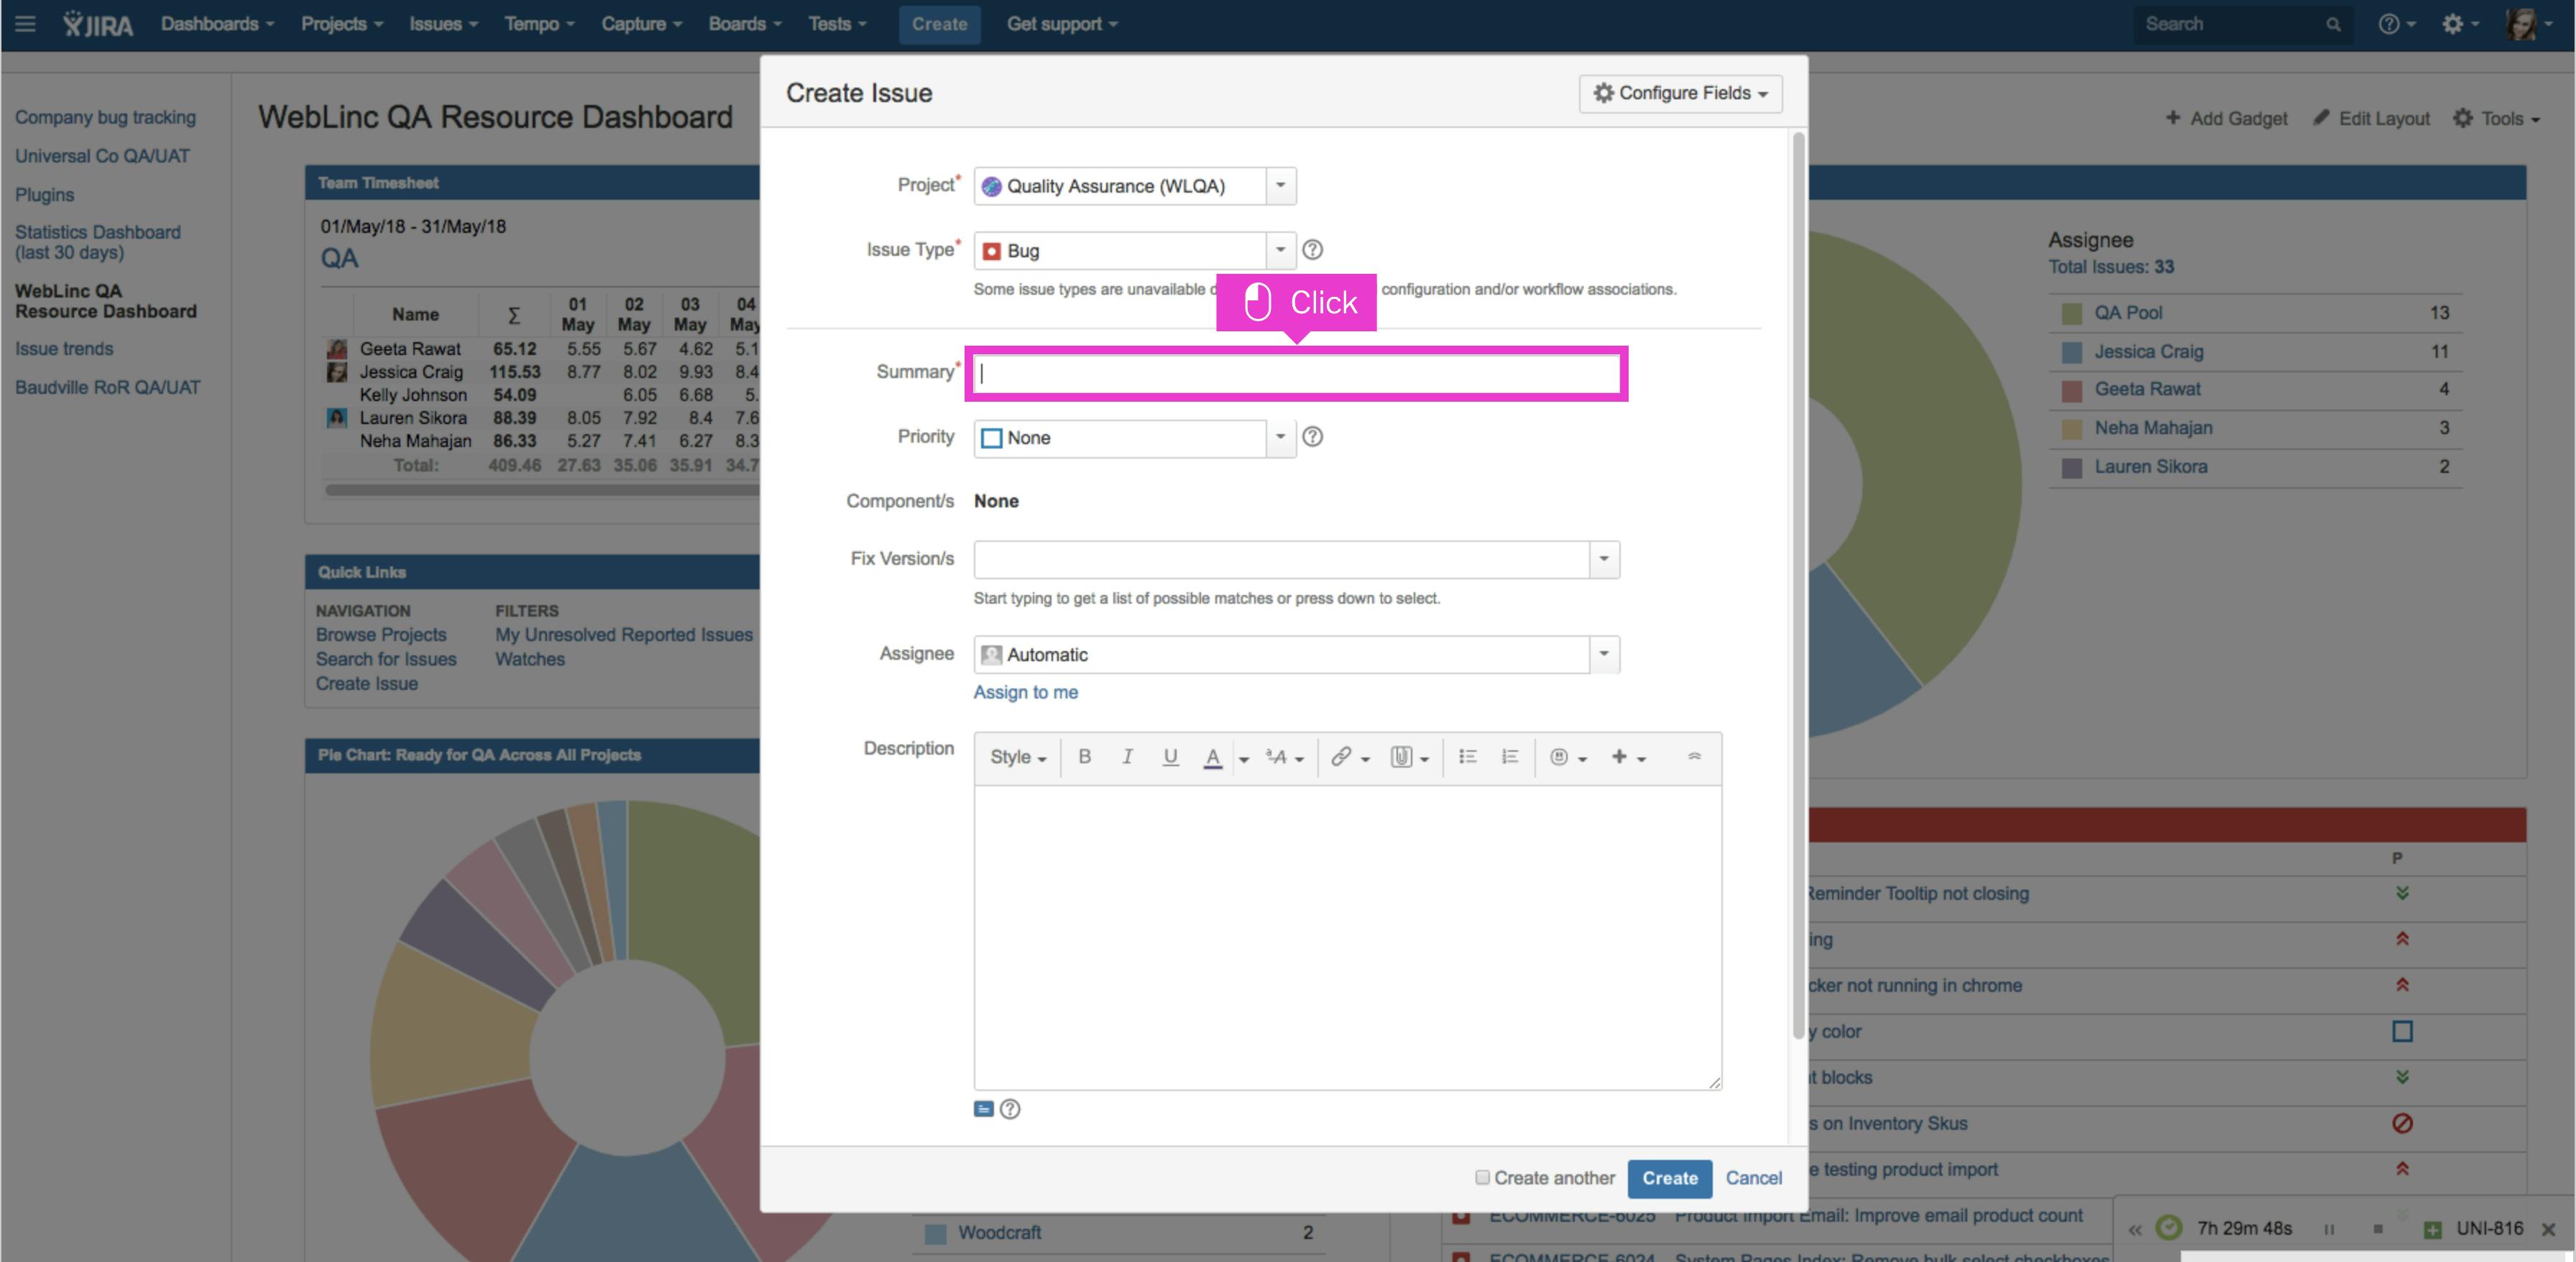
Ensure that your title is clear, short, and descriptive:
Example title: "WebLinc logo appears blurry"
📝 Step 3: Explain the Problem
Use plain language to describe what's wrong.
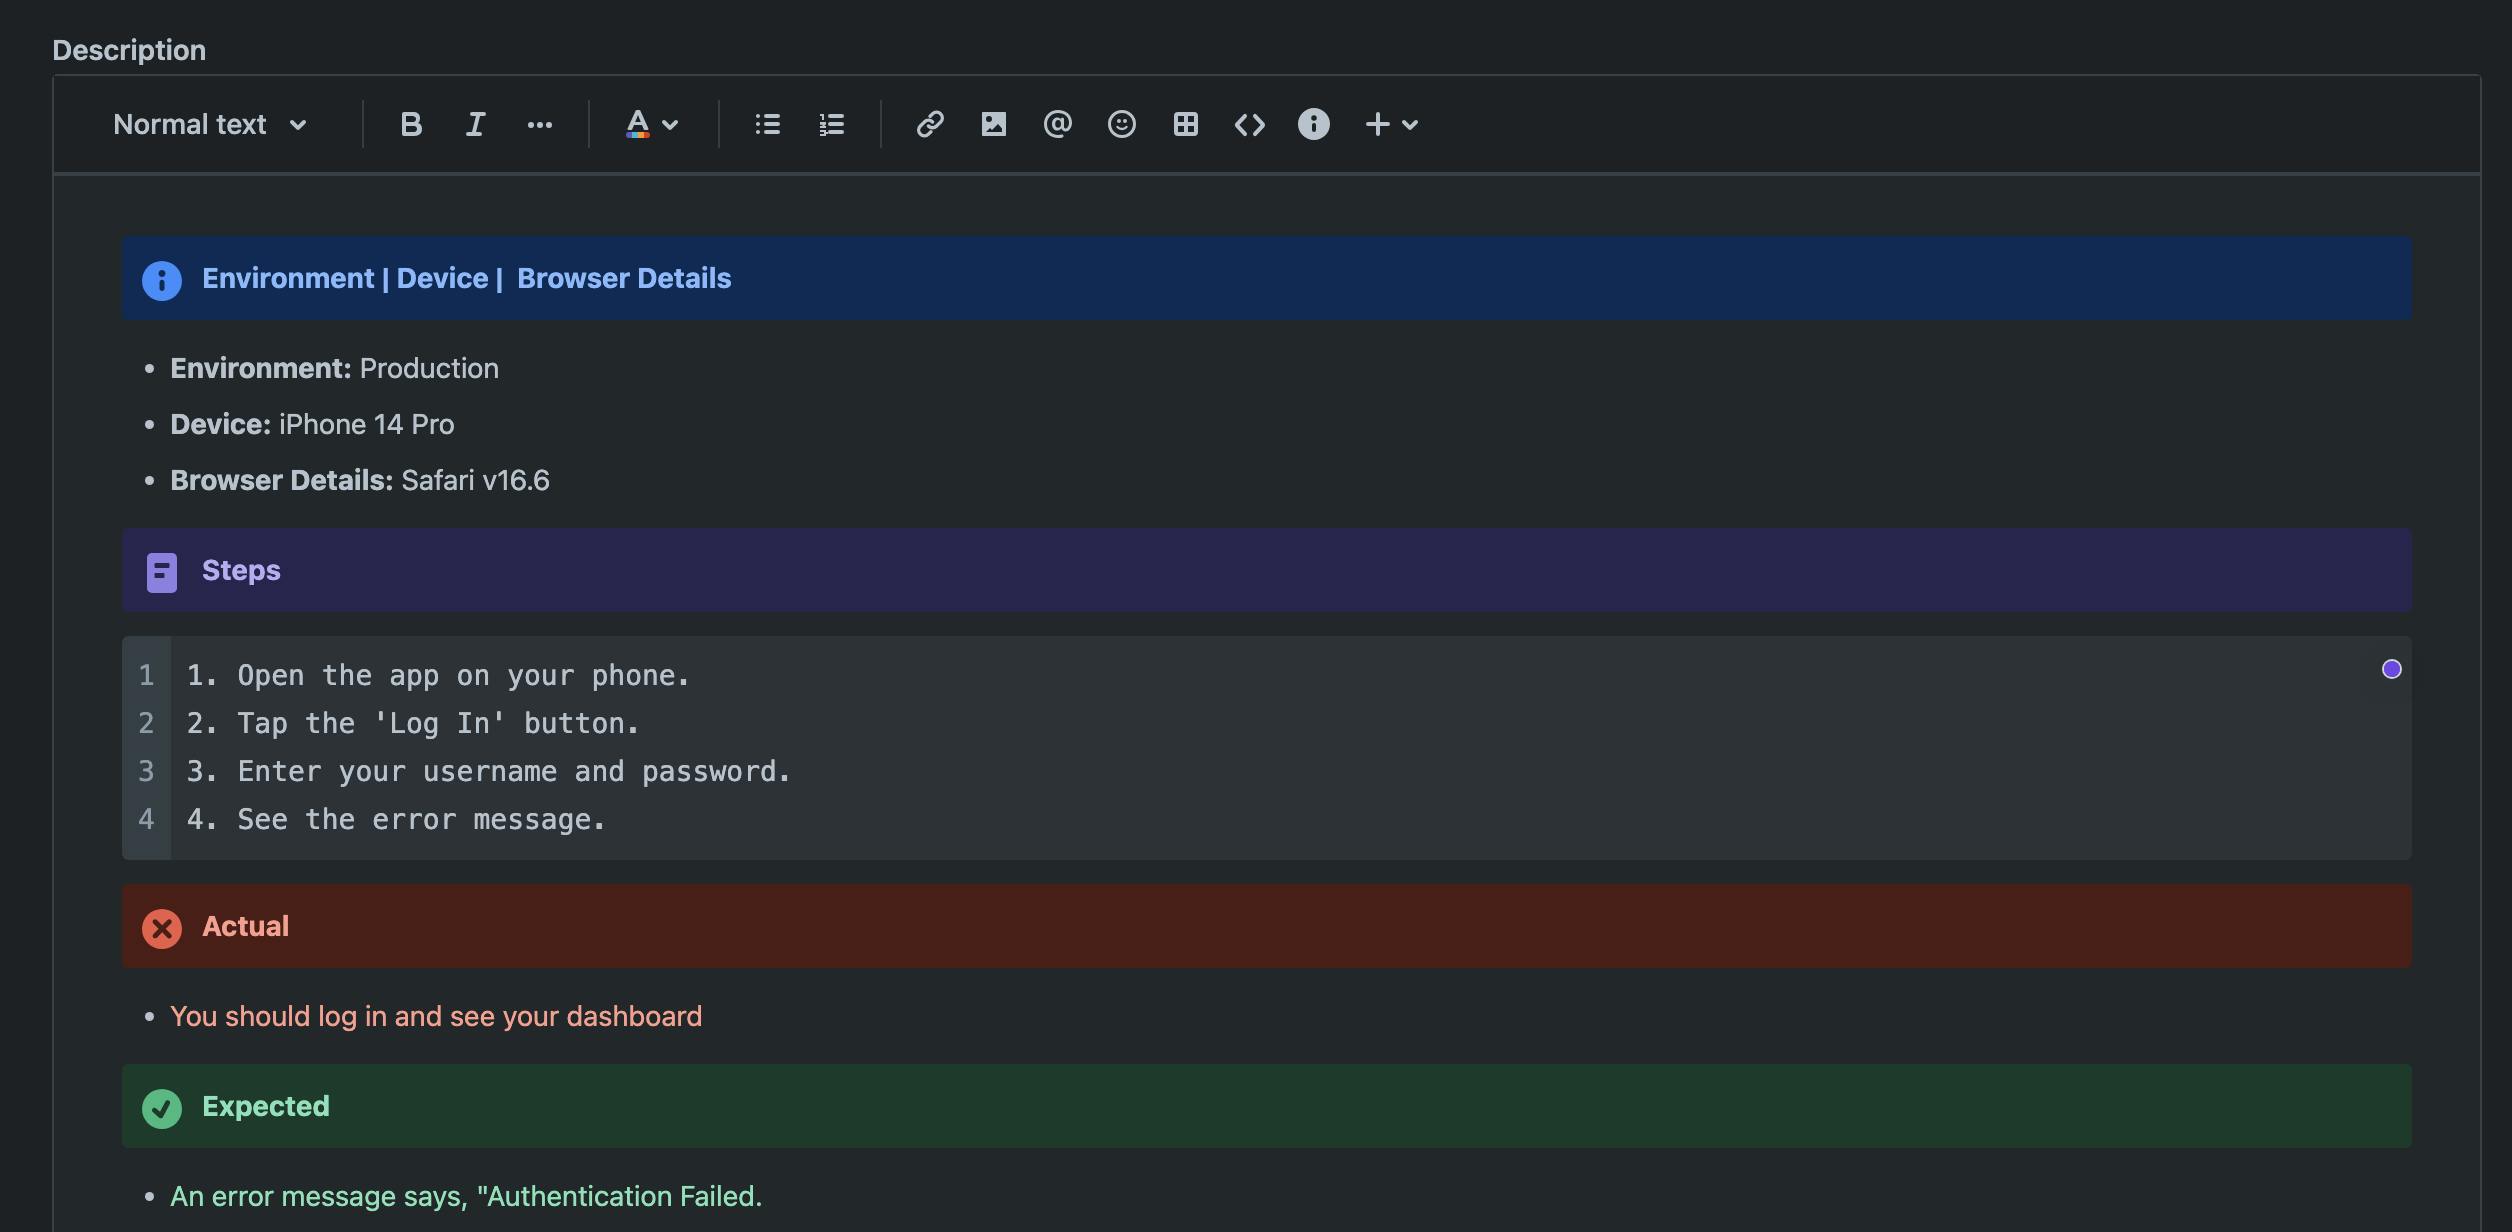
Click within the Description field and enter the bug description.
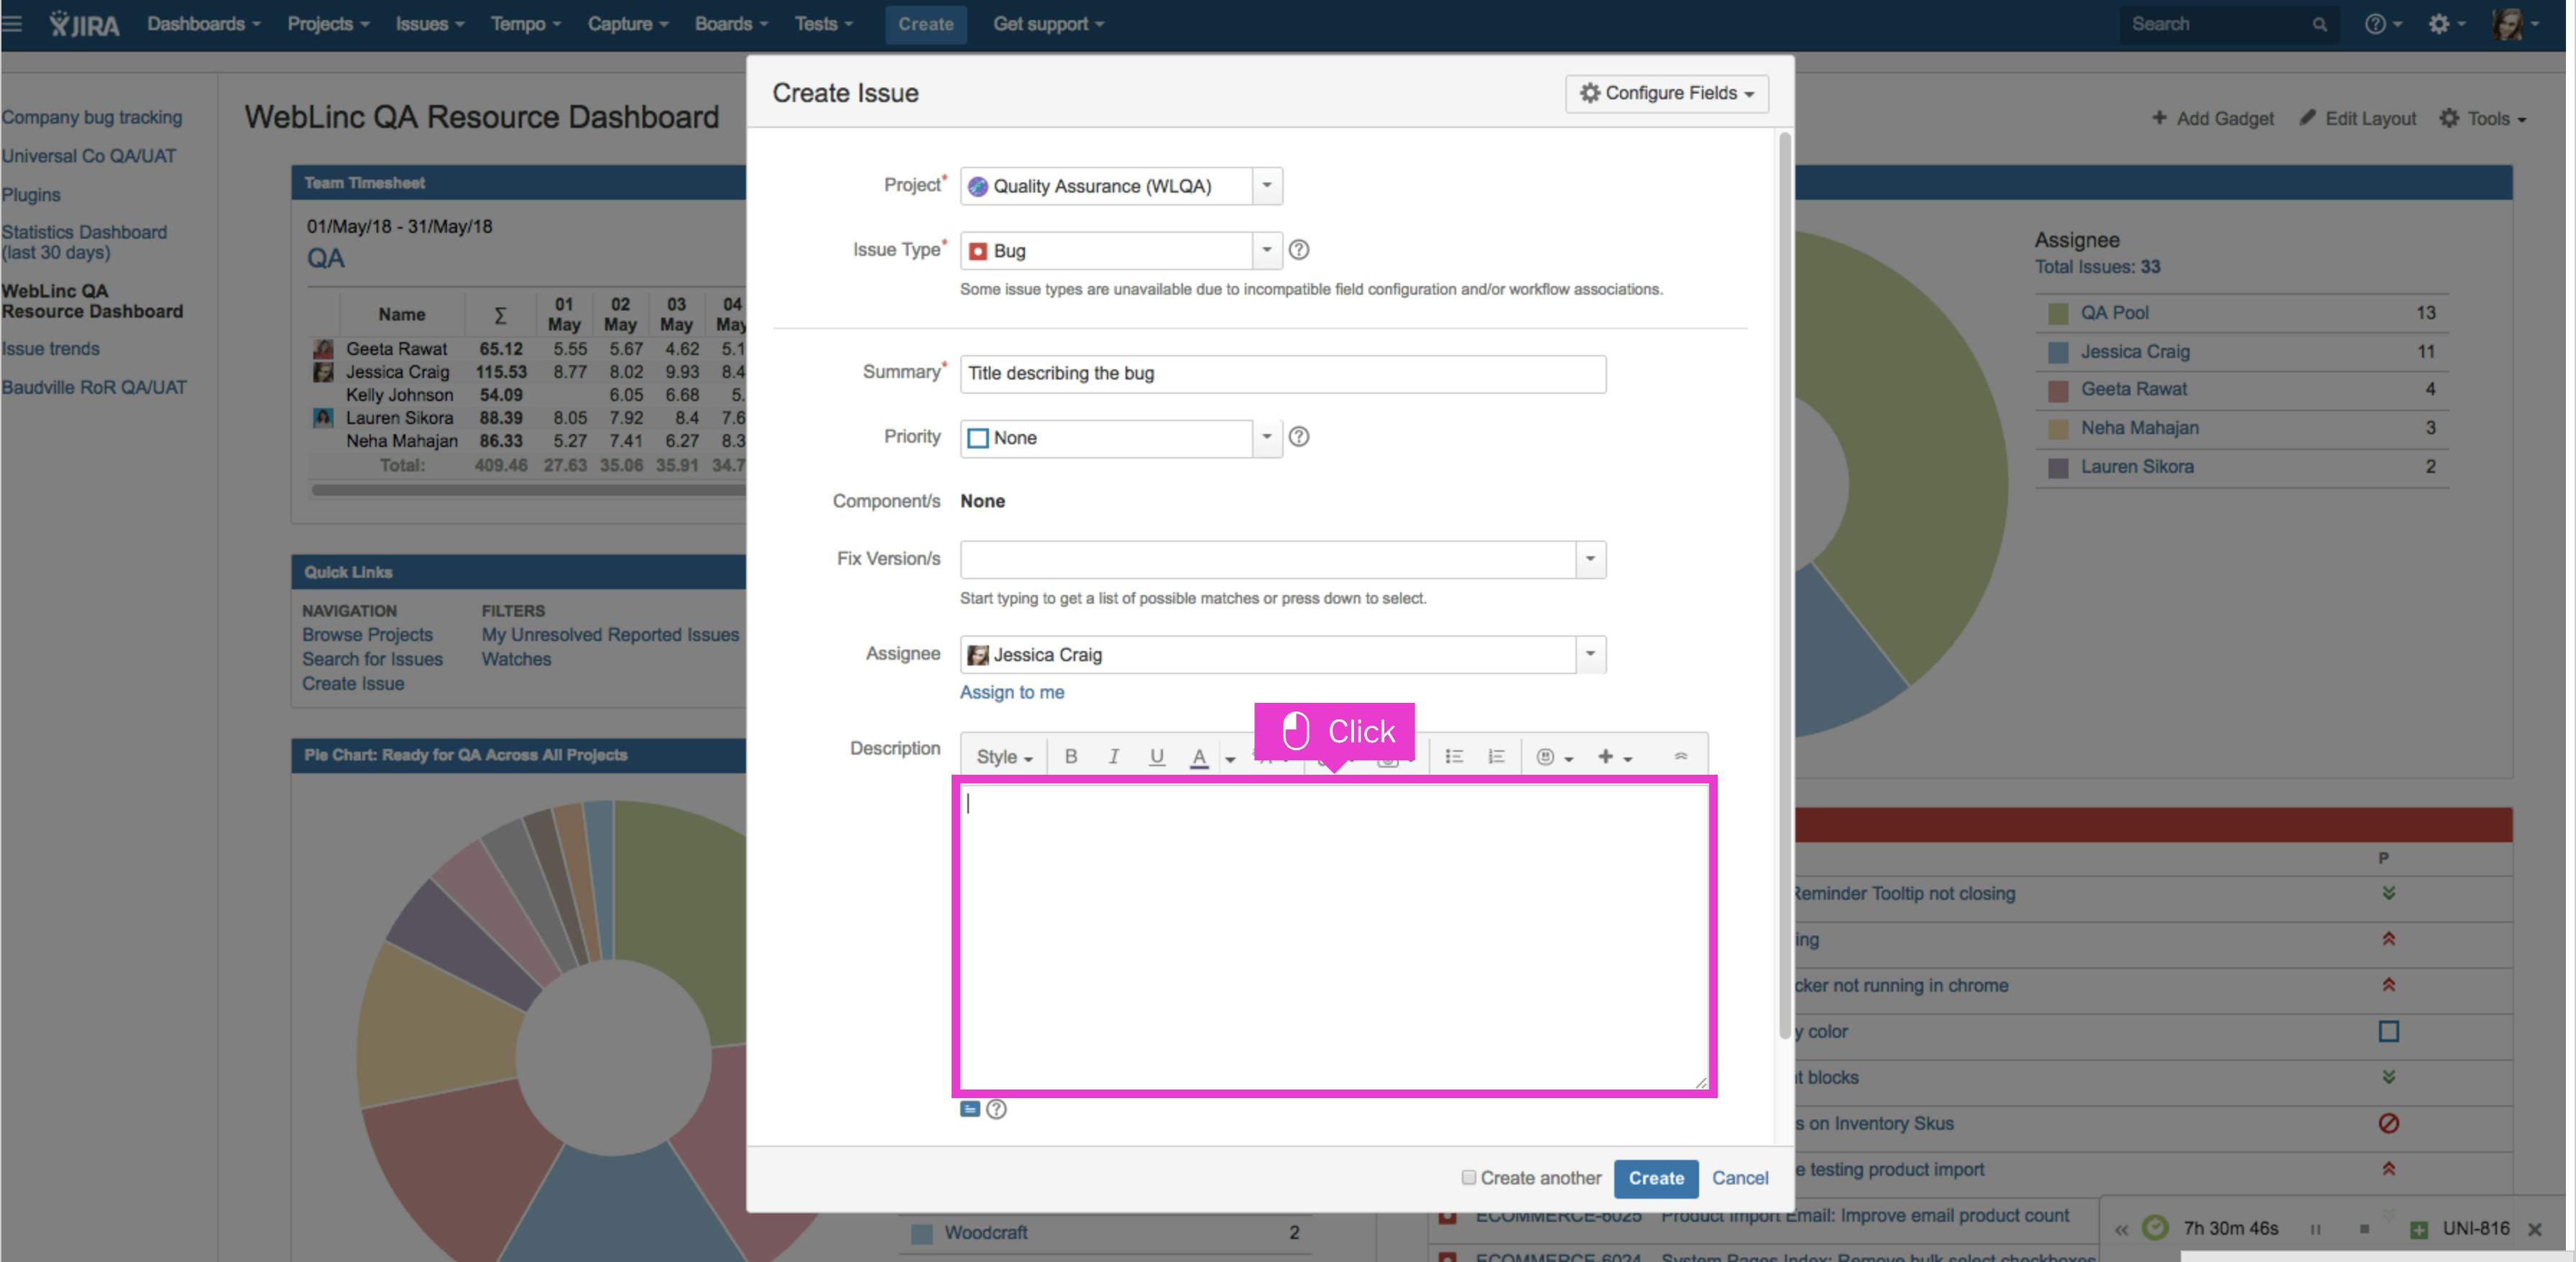
**Steps to Reproduce:**
1. Open the app on your phone.
2. Tap the 'Log In' button.
3. Enter your username and password.
4. See the error message.

**Expected**: You should log in and see your dashboard.

**Actual**: An error message says, "Authentication Failed."
Descriptions should be presented in a systematic and understandable manner,
Always Include:
Steps to Reproduce: List the exact steps to make the bug appear.
Expected vs. Actual: Explain what should have happened and what actually happened.
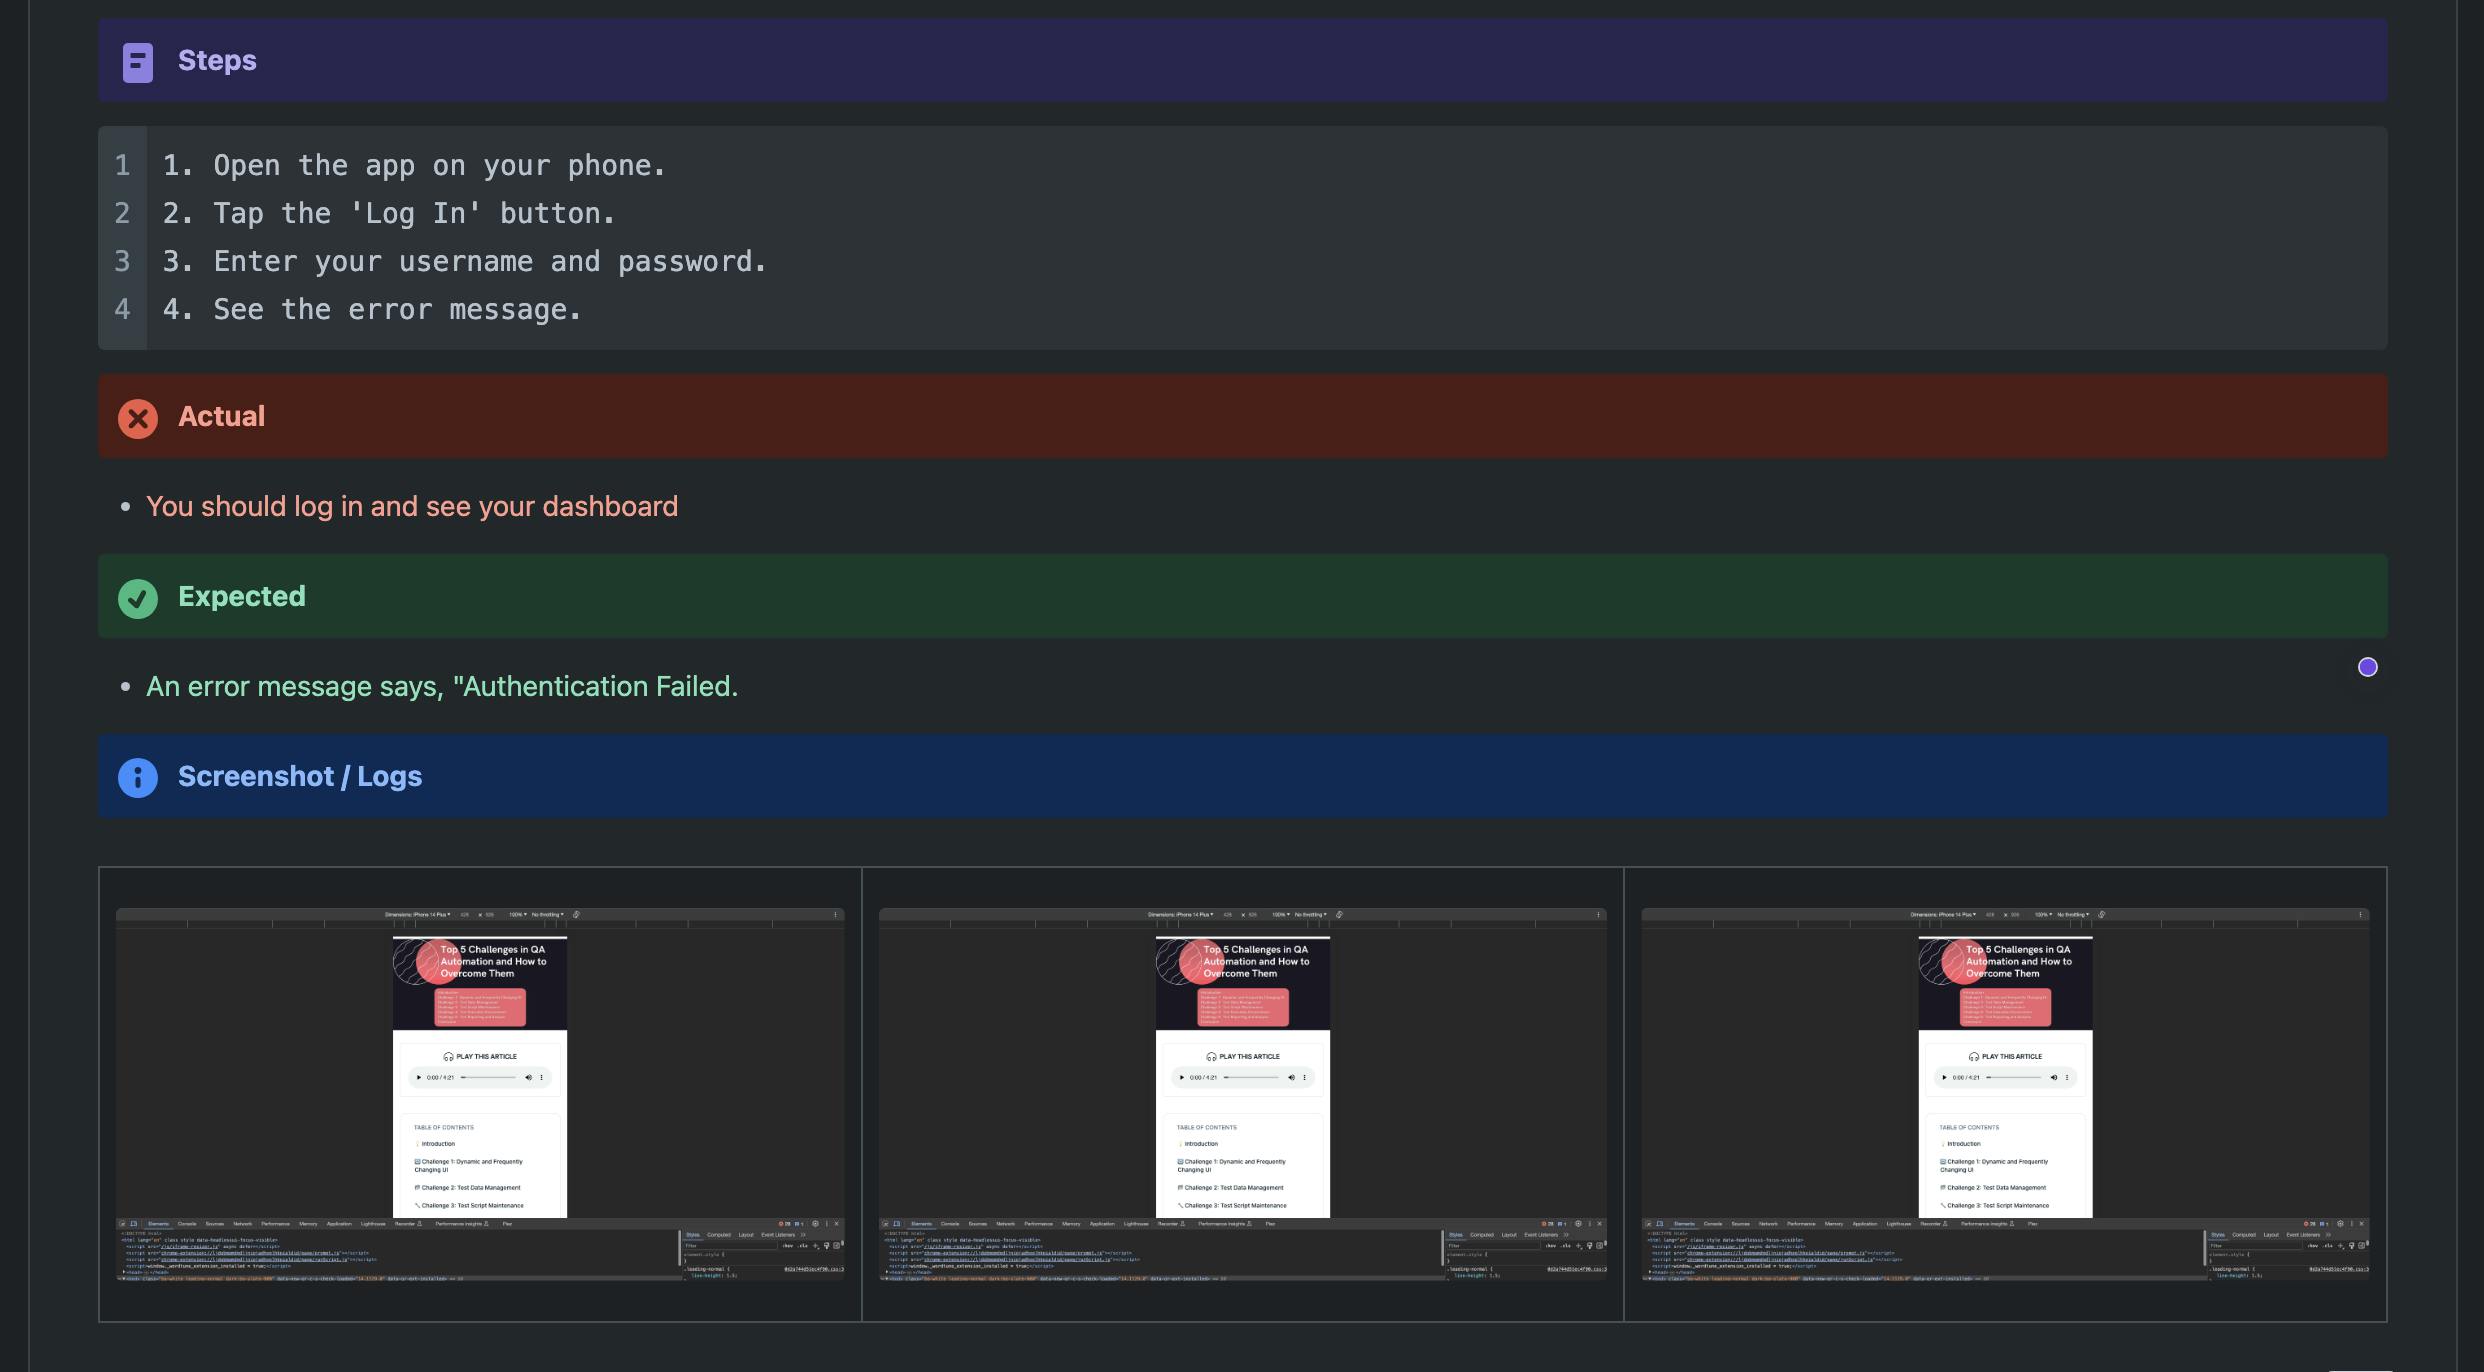
Pictures or Files: Attach screenshots or files if they help.
Device and Browser Details: Tell them where you found the bug.
Error Messages: If there's an error message, copy it here.Example:
🦸♀️ Step 4: Assign the Bug to the Right Person
Assign the bug to the appropriate developer or team member responsible for addressing it. This ensures accountability.
Click to open the Assignee field and choose the assignee. The assignee is whom you are assigning the bug ticket to.
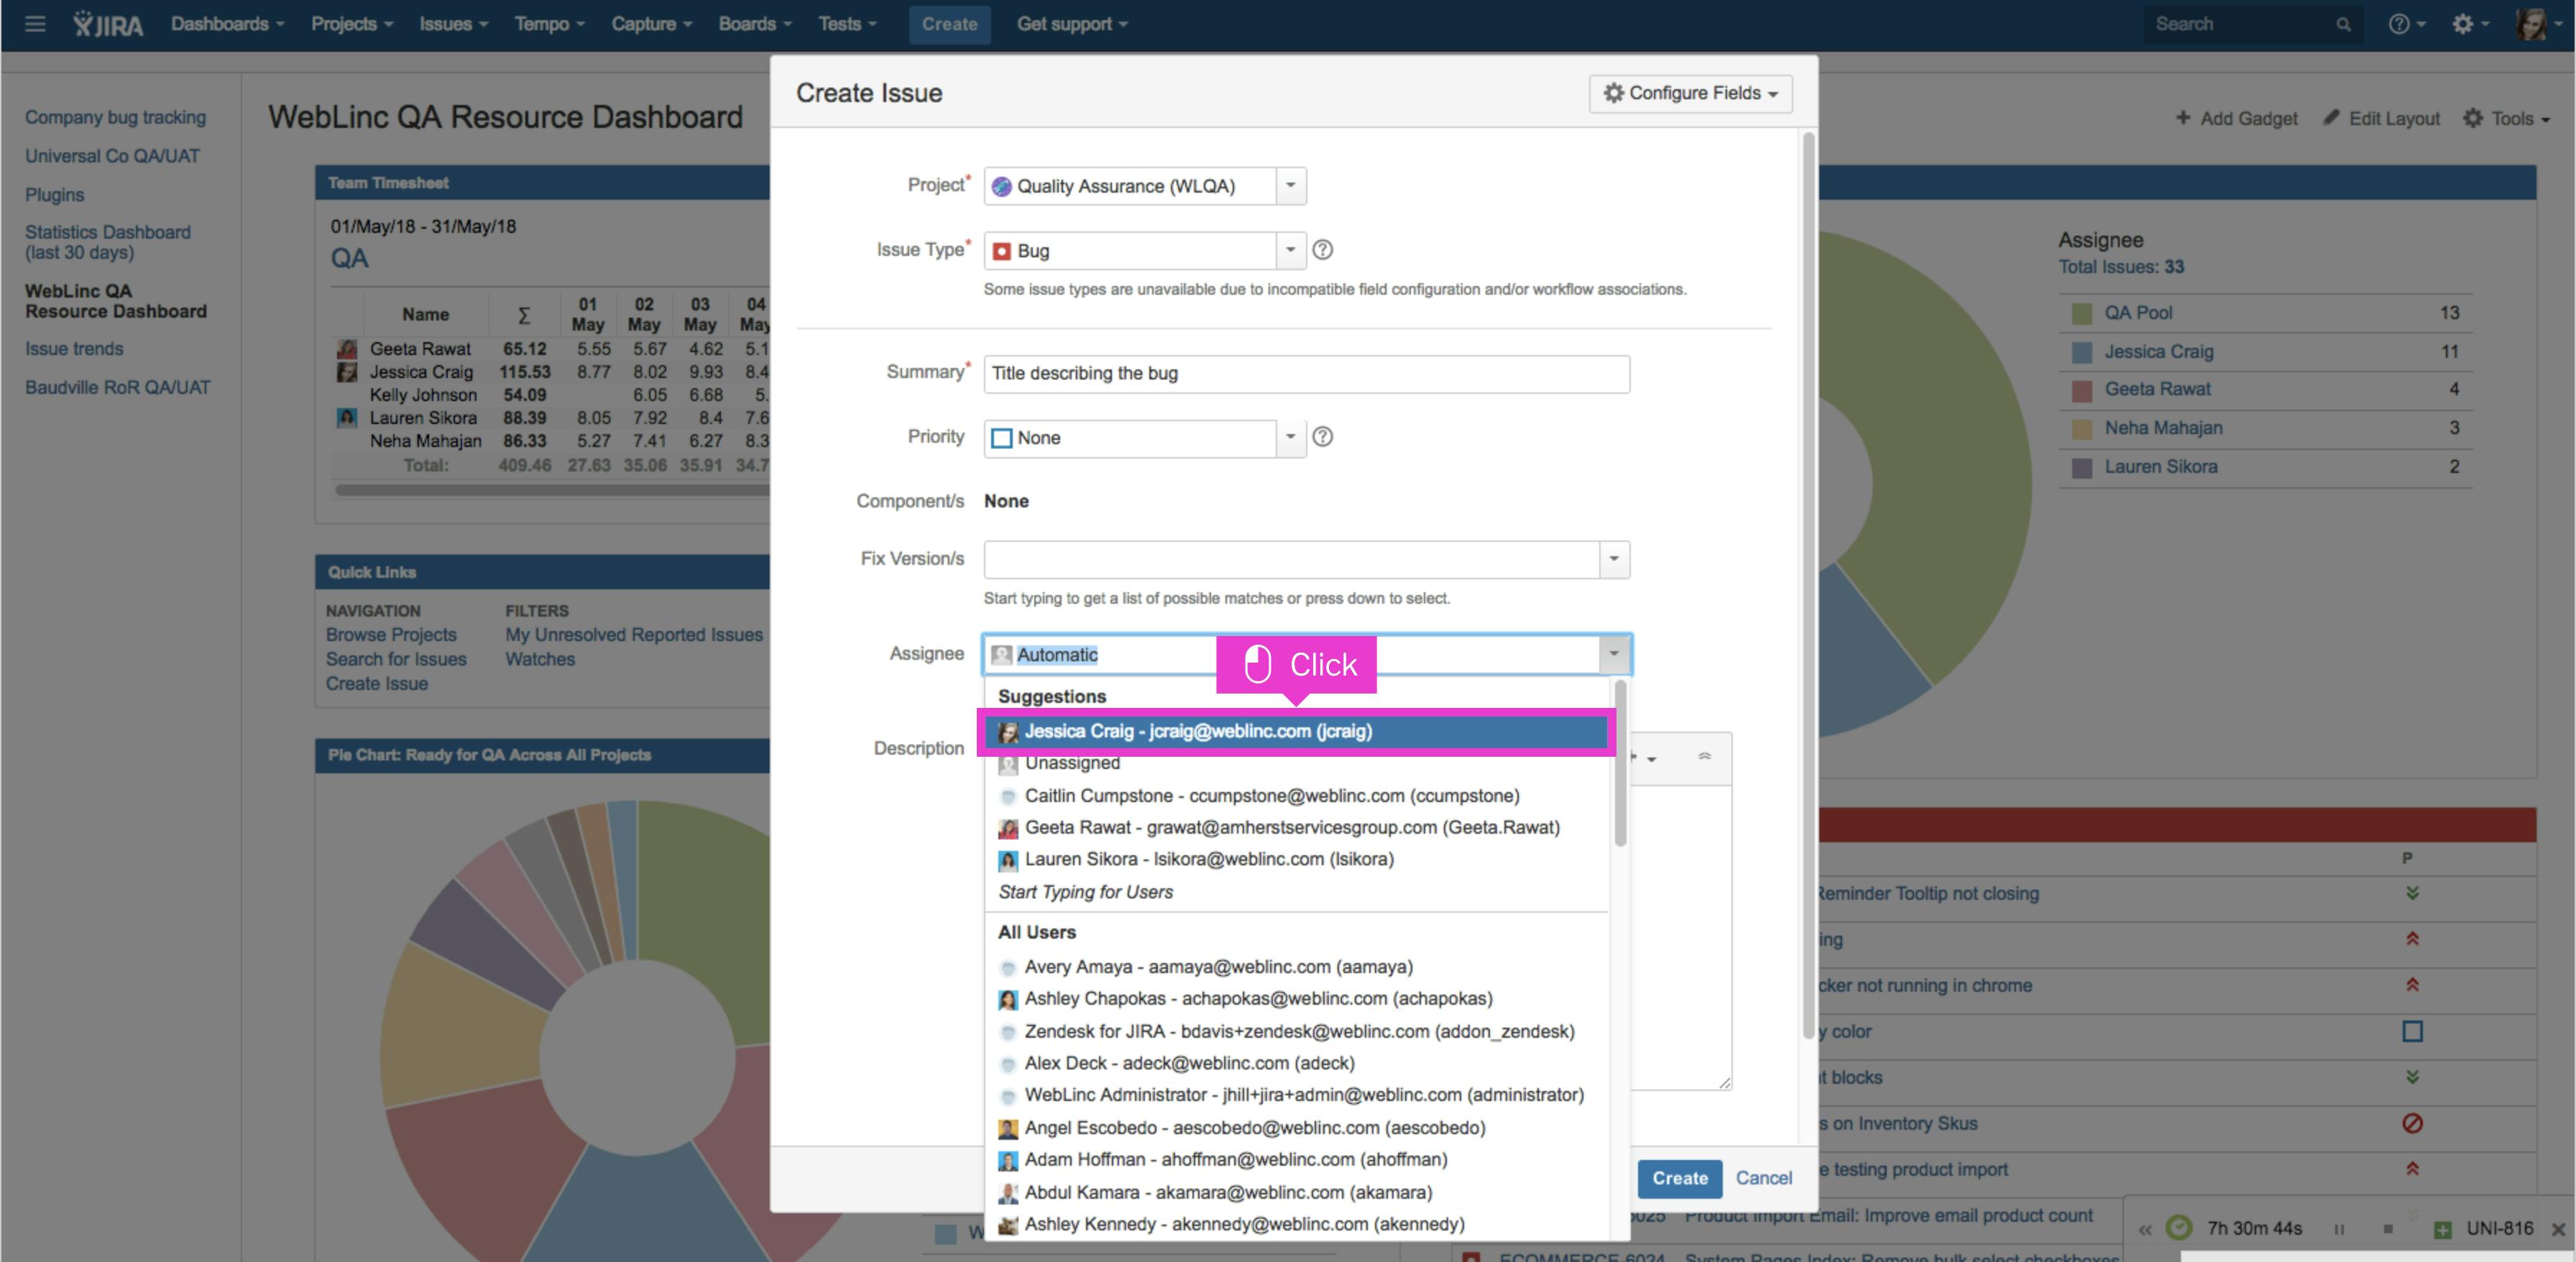
When in doubt, assign bug tickets to your Lead or Manager. Choosing "Automatic" will assign the ticket to the project's PM.
🛠️ Step 5: Set Priority and Severity
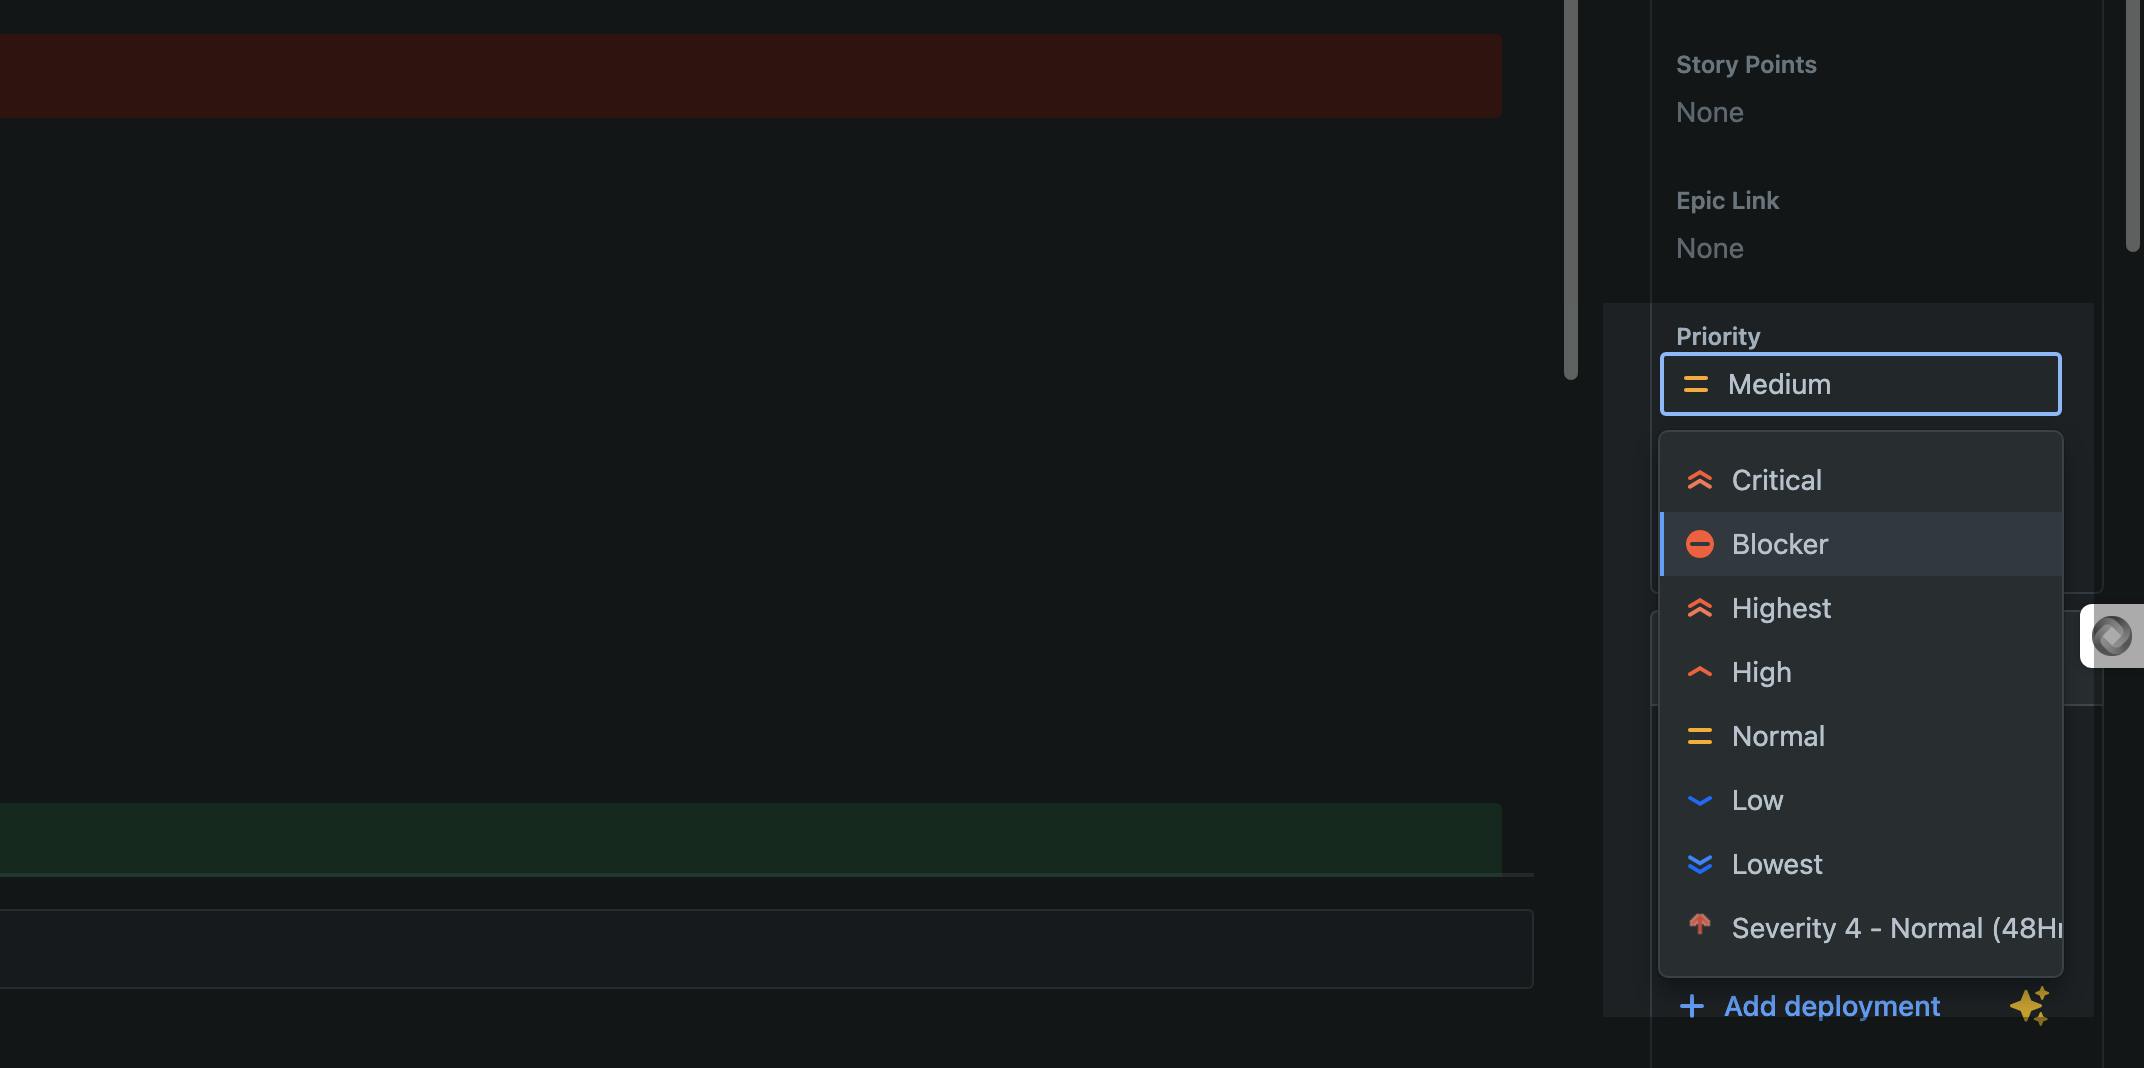
Define the bug's priority and severity. Priorities range from "Blocker" (critical) to "Trivial" (minor), while severity measures the impact on the user.
📉 Step 6: Add Relevant Labels and Components
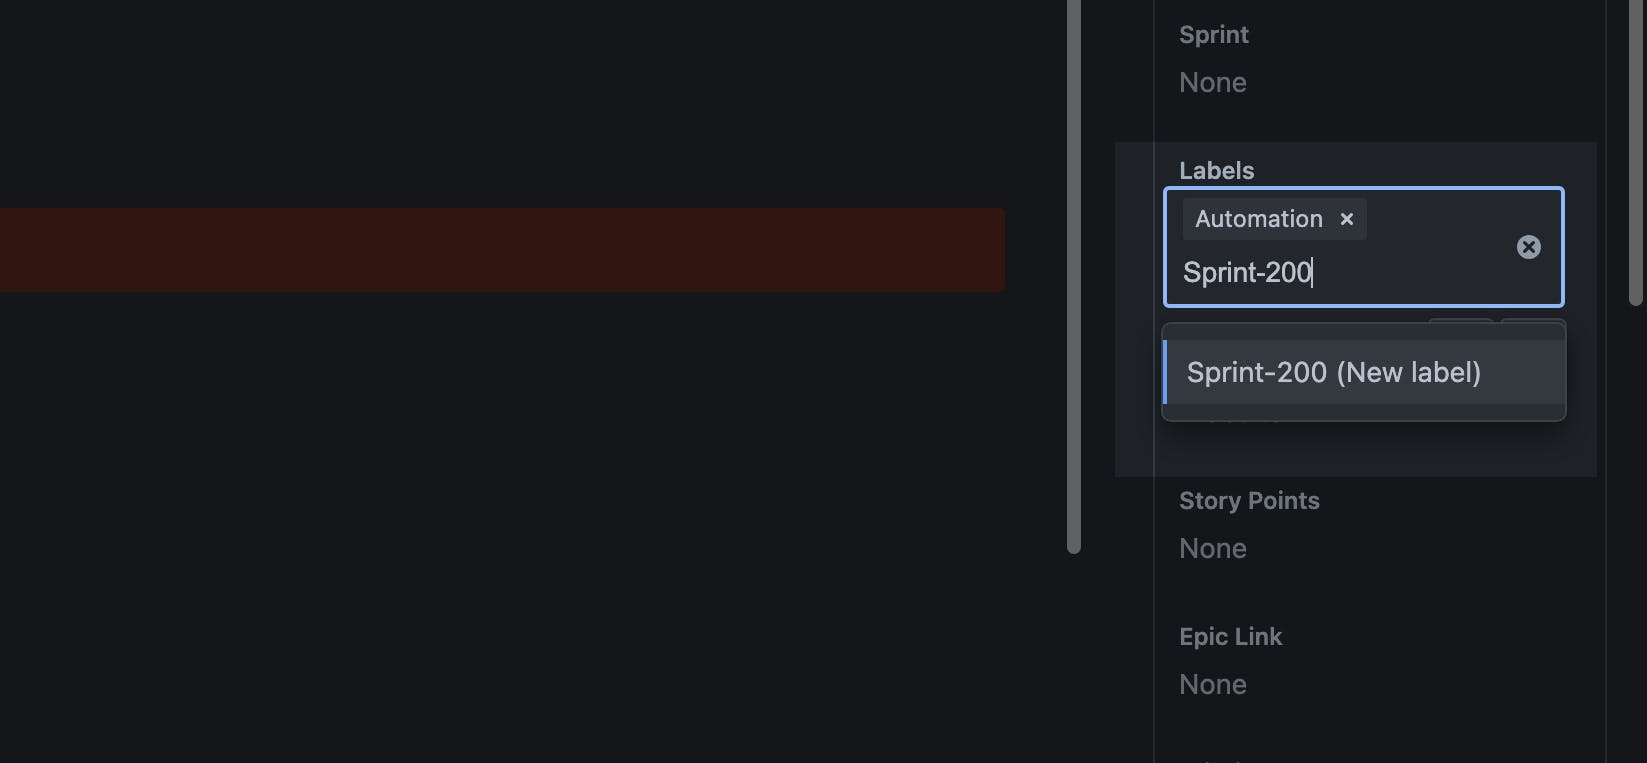
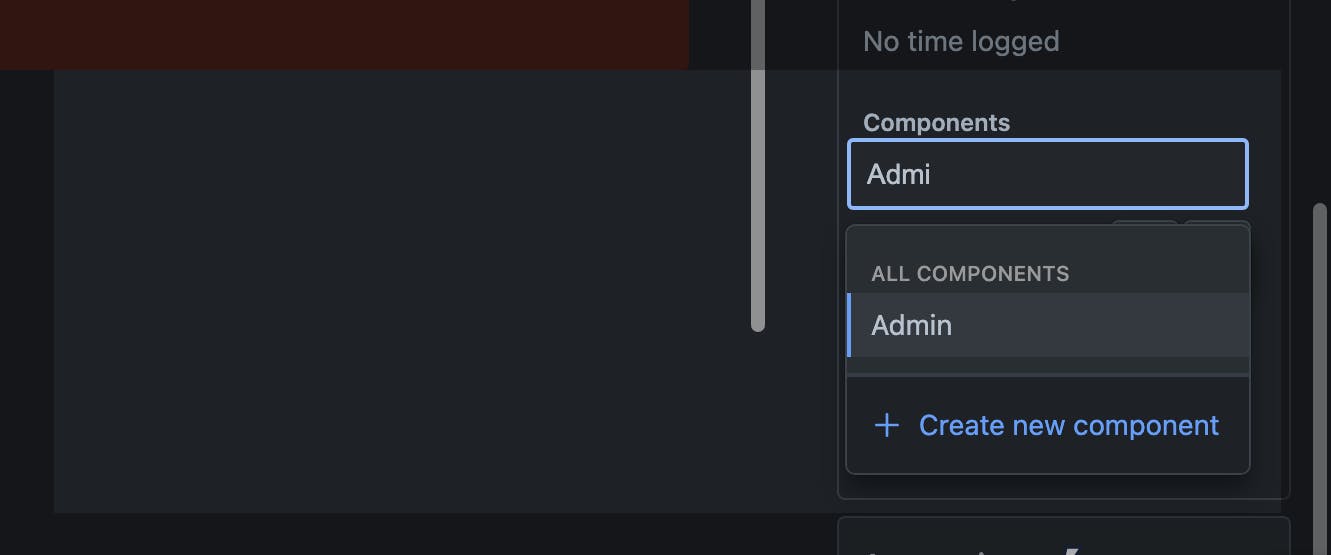
Use labels and components to categorize the bug further. Labels like "UI", "Backend", "Automation", "Sprint-200" or "Critical" can aid in sorting and filtering.
Labels:
Component:
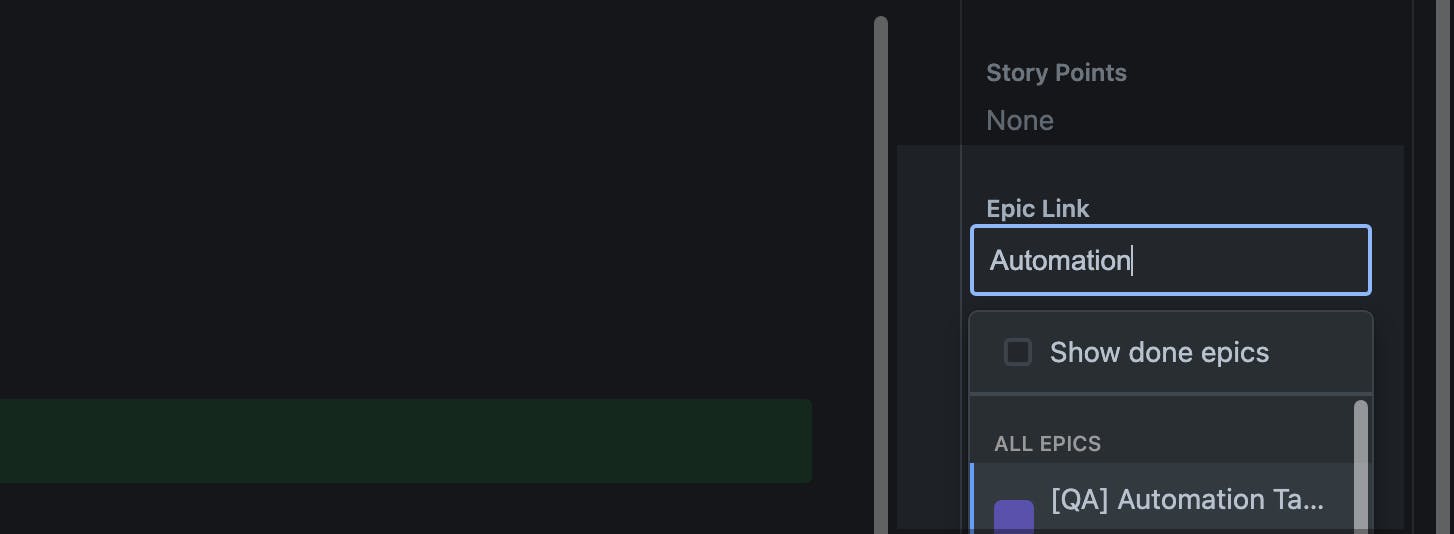
📄 Step 7: Link the Relevant Epic story
If applicable, link the ticket with the relevant Epic story or requirement.
🎯 Step 8: Select the Sprint if you are following Scrum/Sprint model
Select the relevant Sprint for working on Bug resolution.

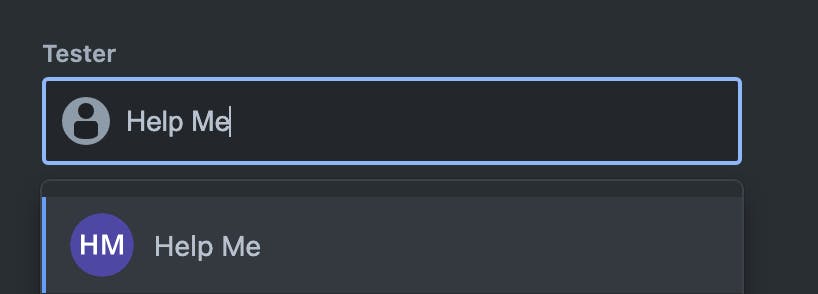
👷♀️ Step 9: Select the Tester
It would be more accurate to choose the relevant tester or to prefer the tester who has raised the bug because the person who has raised the bug is better able to understand and test it.
📤 Step 10: Link the Bug ticket with Reference Tickets
Bug tickets should be linked to tickets related to, causing, or resulting from the bug.

🖊️ Step 11: Review and Submit
Review the bug ticket to ensure all necessary information is included. Once you've finished adding your bug details in the description, select the Create button to complete.
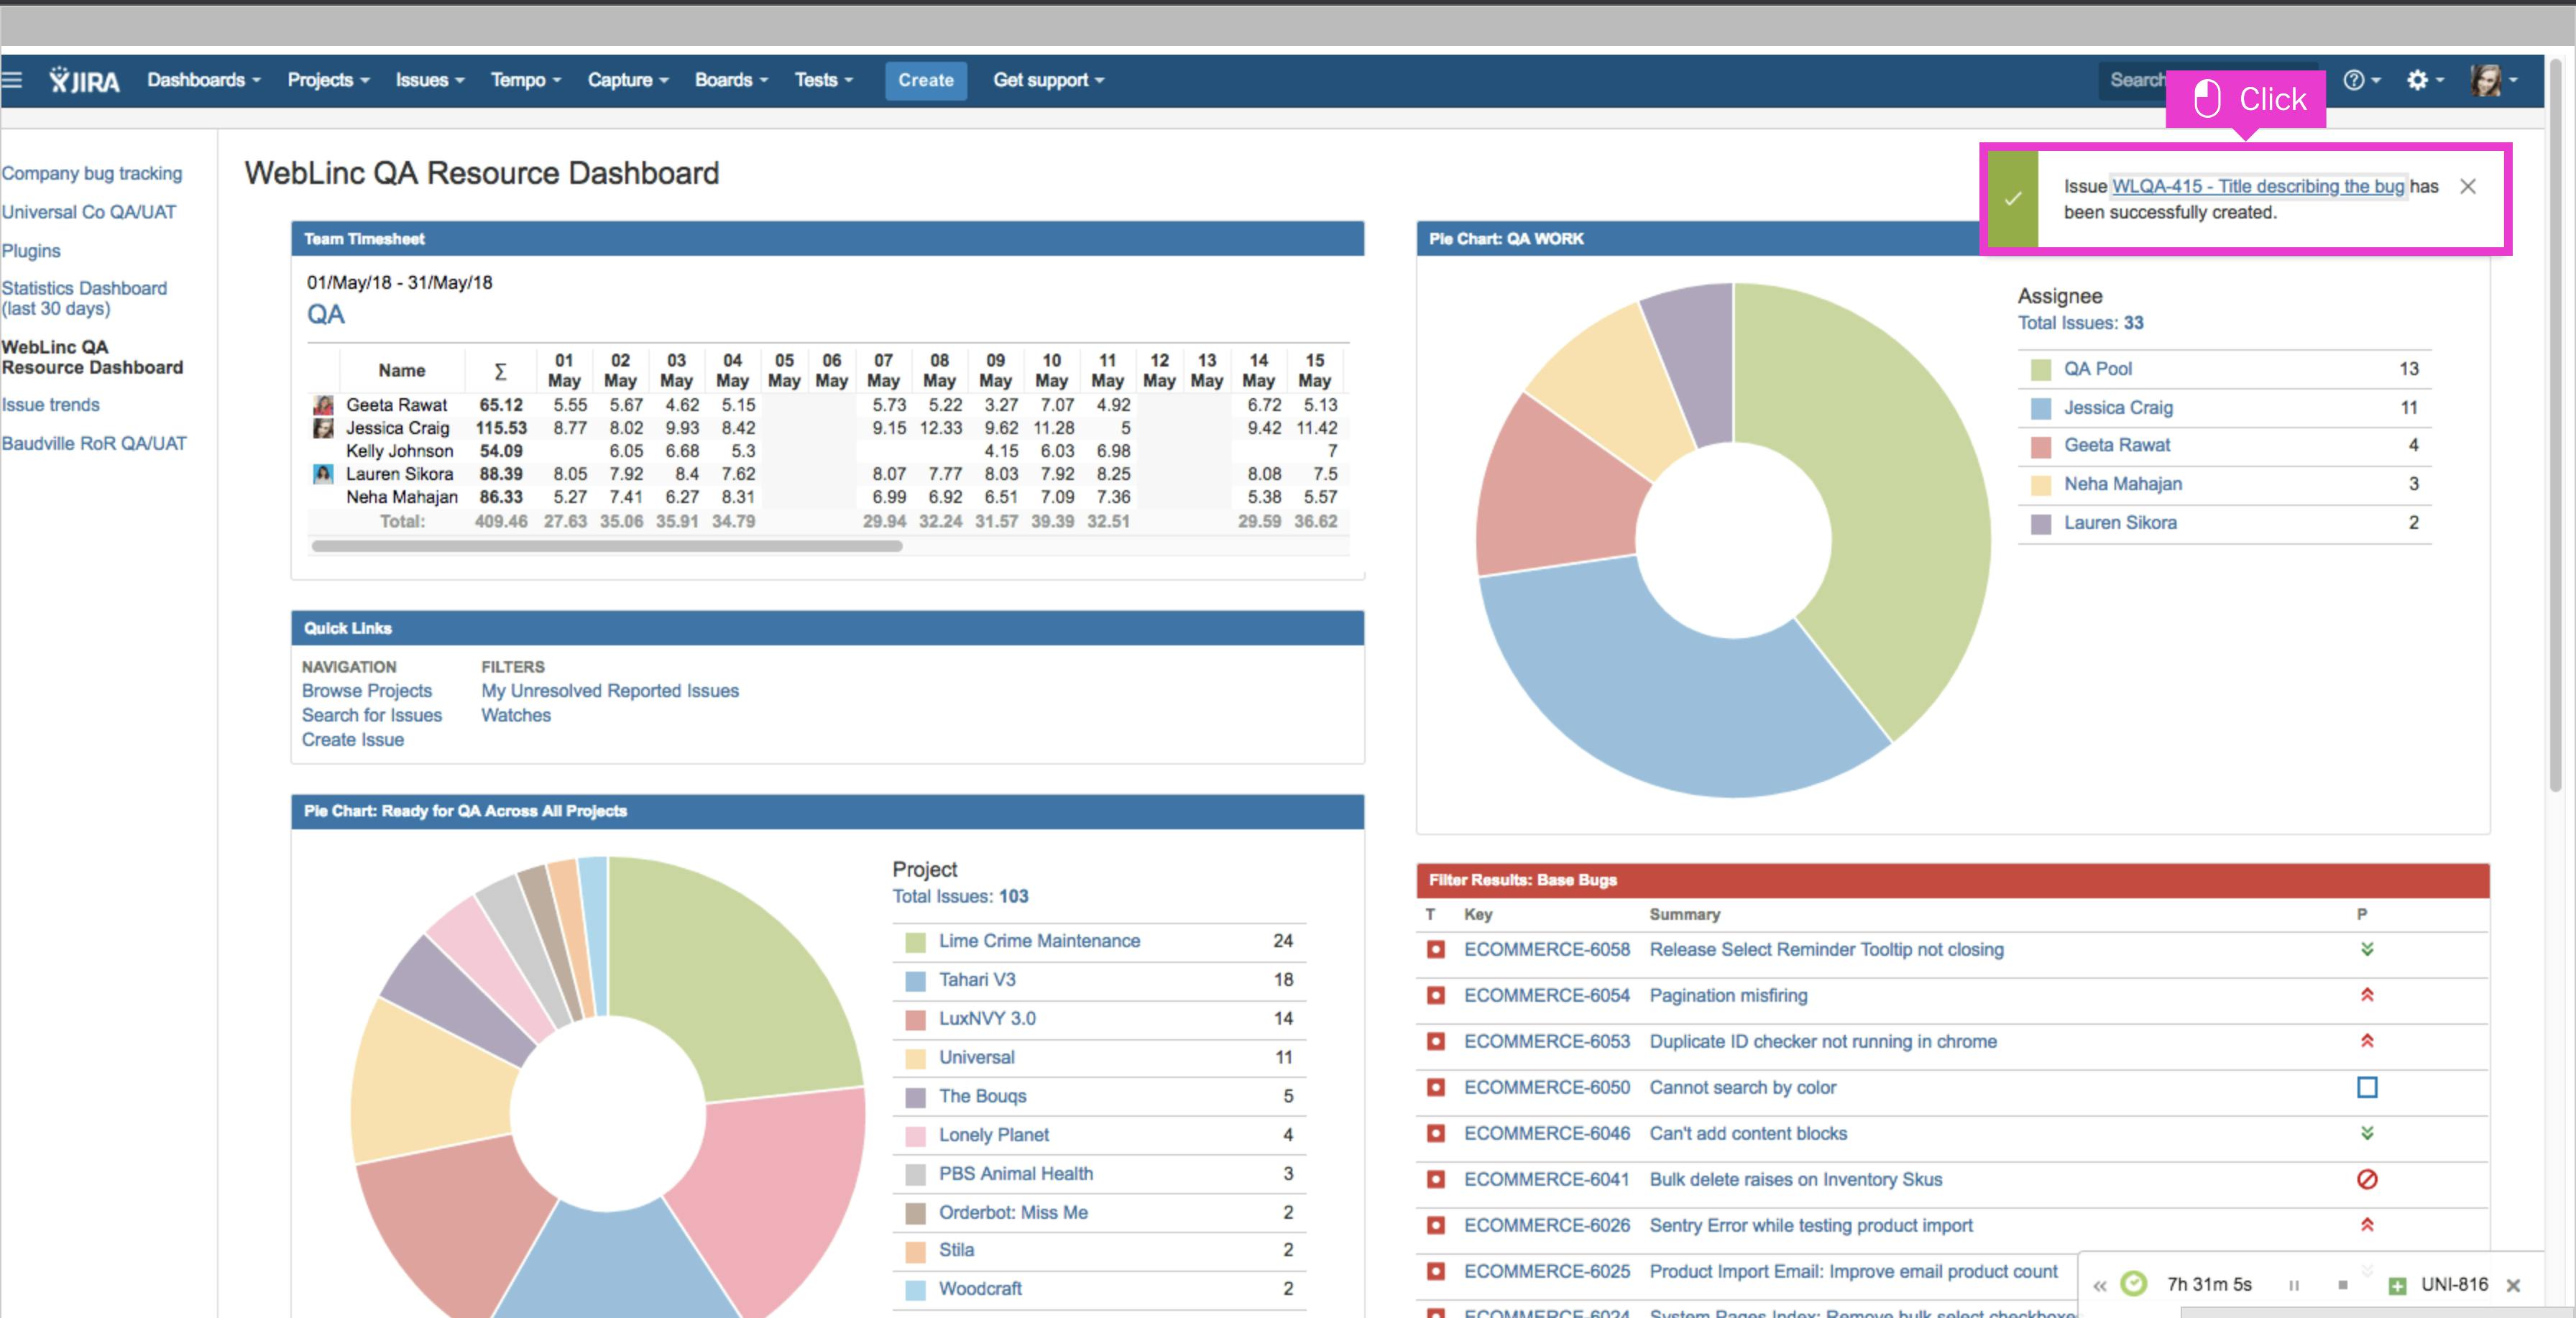
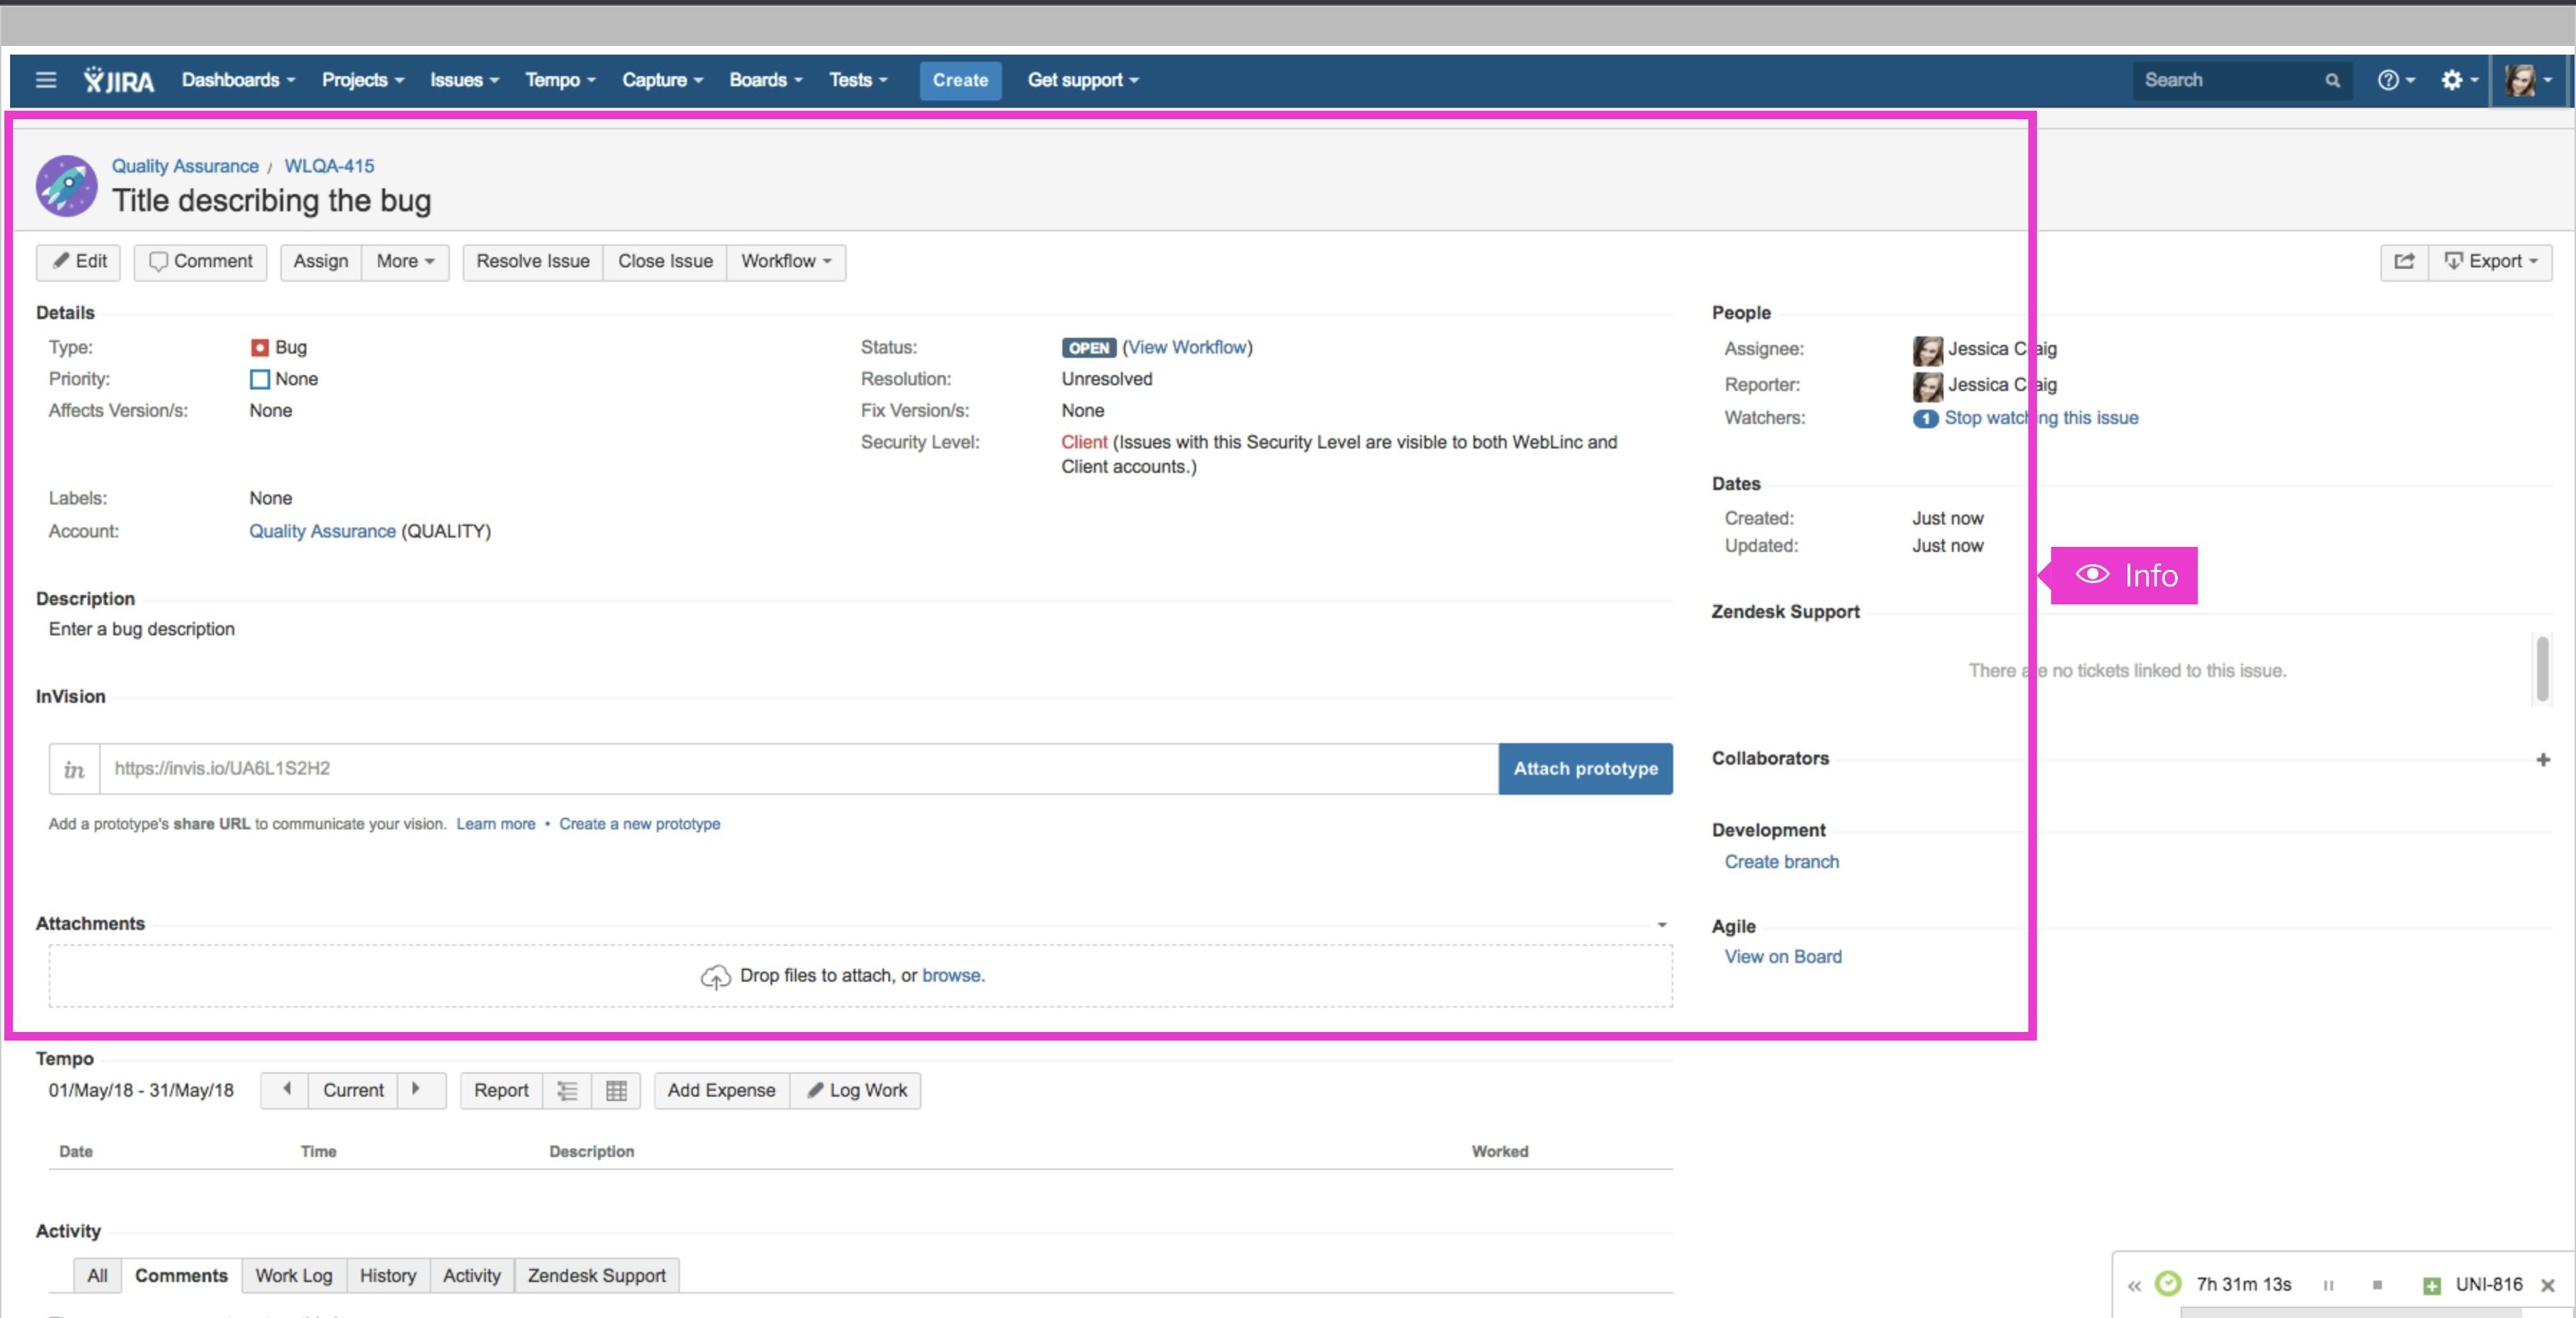
Observe the confirmation message displayed in the top right corner. Click the link populated in the success message to navigate to the new ticket.
That's it. You're done. You've created a new bug ticket for your project.
💯 Additional Tips for Efficient Bug Ticket Creation
Be Concise: Provide all essential details but avoid unnecessary verbosity.
Use Templates: Consider using a bug reporting template to ensure consistency in the bug ticket structure.
Stay Organized: Keep your bug tickets organized by using filters, custom views, and dashboards in JIRA.
Regular Updates: If there are developments or changes regarding the bug, update the ticket promptly.
Collaborate: Encourage collaboration between QA and development teams. Discuss bugs when needed to clarify doubts.
🔦 Conclusion
Creating efficient bug tickets in JIRA is an art that can significantly enhance the bug resolution process. Clear, detailed, and organized bug tickets lead to quicker fixes, improved communication among team members, and a smoother development cycle. By following the steps and tips outlined in this blog, you'll be well on your way to mastering this essential skill in software development.
✨ Resources for Further Reading
Happy bug hunting! 🐛🔍